The Race Roster CRM email campaign tool lets you send marketing email campaigns to your organization’s contacts. Email campaigns are sent to contacts based on custom reports created in your organization. This allows you to send targeted campaigns, resulting in effective marketing by reaching the right audience with the right message. Here is an overview of the scope of this tool:
- unlike event email campaigns , which can send both transactional and promotional emails, CRM email campaigns are specifically designed to send promotional emails ; this helps streamline your marketing efforts and reach your contacts more effectively, across multiple events, while staying compliant with legislation; learn more about RR email campaign types
- unlike event email campaigns, where the list of recipients is determined by trigger logic established within the campaign creation process, a CRM email campaign's "To" list is a contact report, contact loyalty report, and contact retention report that has been been previously created in the organization; one or more of these kinds of custom reports are eligible for selection (the only kind not eligible: contact registration reports); learn more about RR CRM custom reports
The following article will walk you through the process of sending your first CRM email campaign. Further down, you may learn about available metrics.
Preliminary step
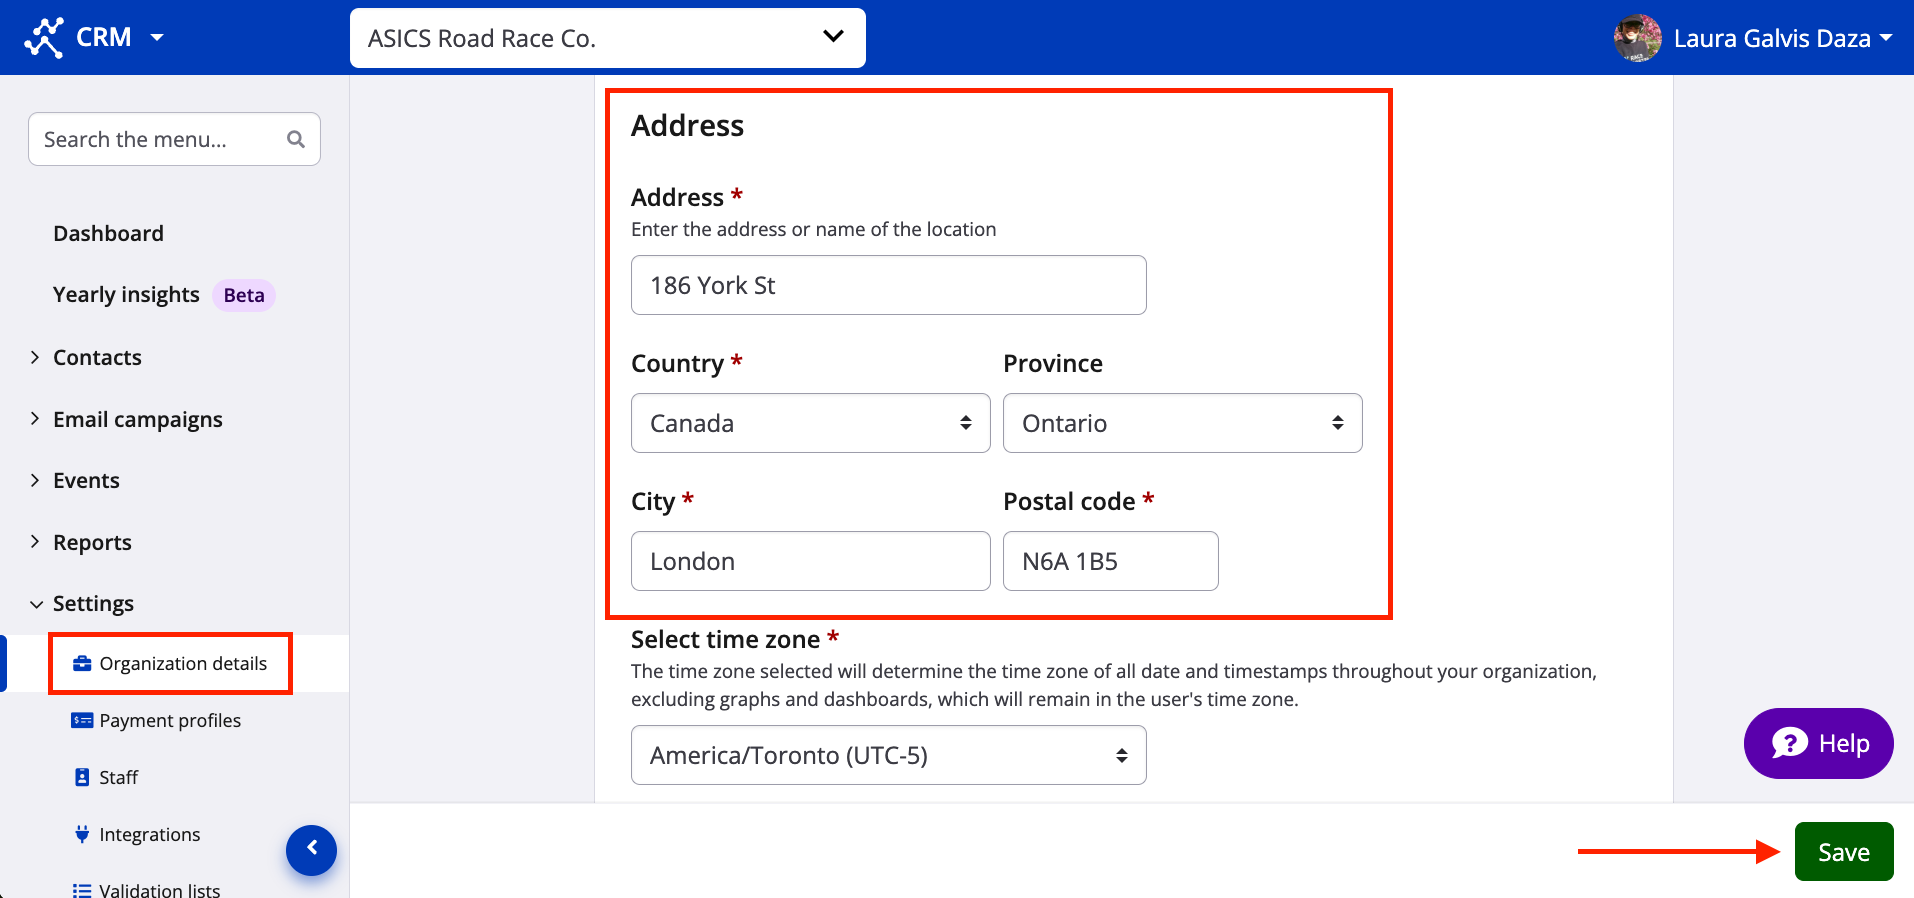
Make sure that your organization details are filled out, particularly the address fields. Per anti-spam legislation across multiple regions, physical mailing addresses must be visible to email campaign recipients. Be sure to click the green "Save" button on the bottom right. Screenshot follows.
Email campaign setup
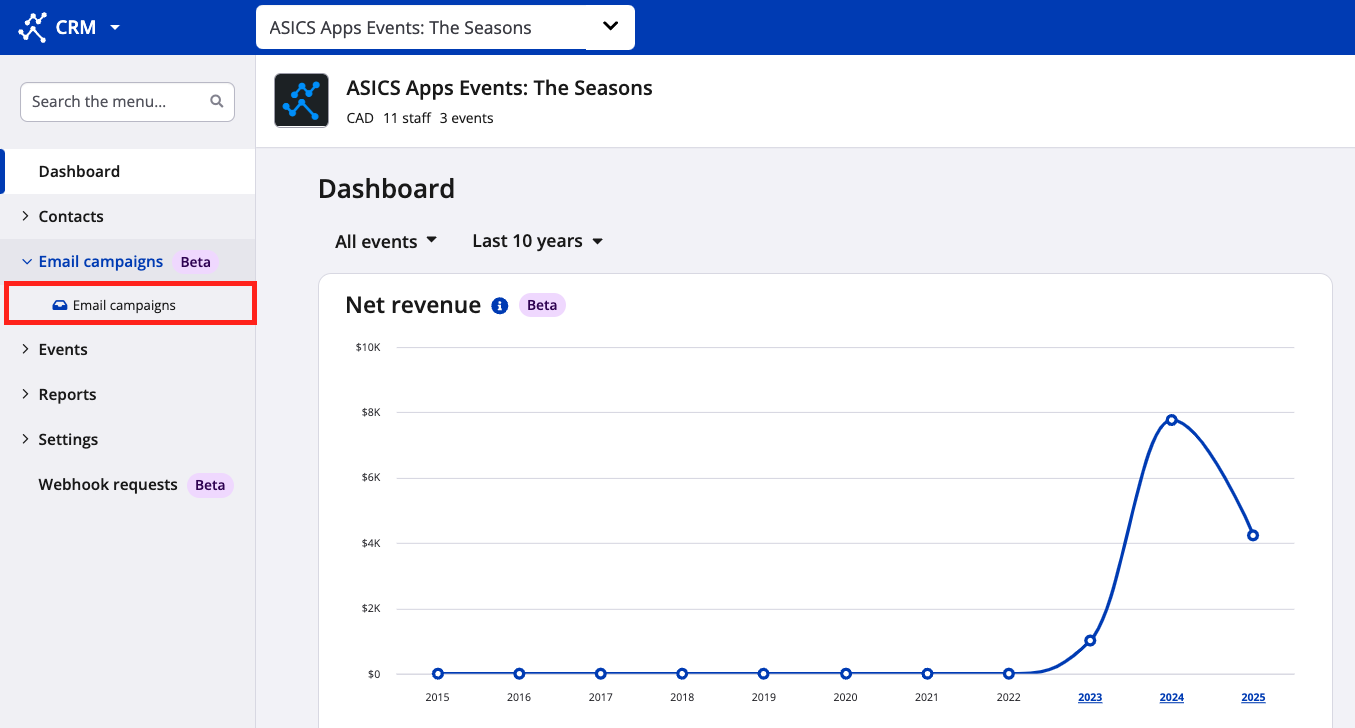
1. From your organization's dashboard in RR CRM, navigate to the lefthand menu and select "Email campaigns". Screenshot follows.
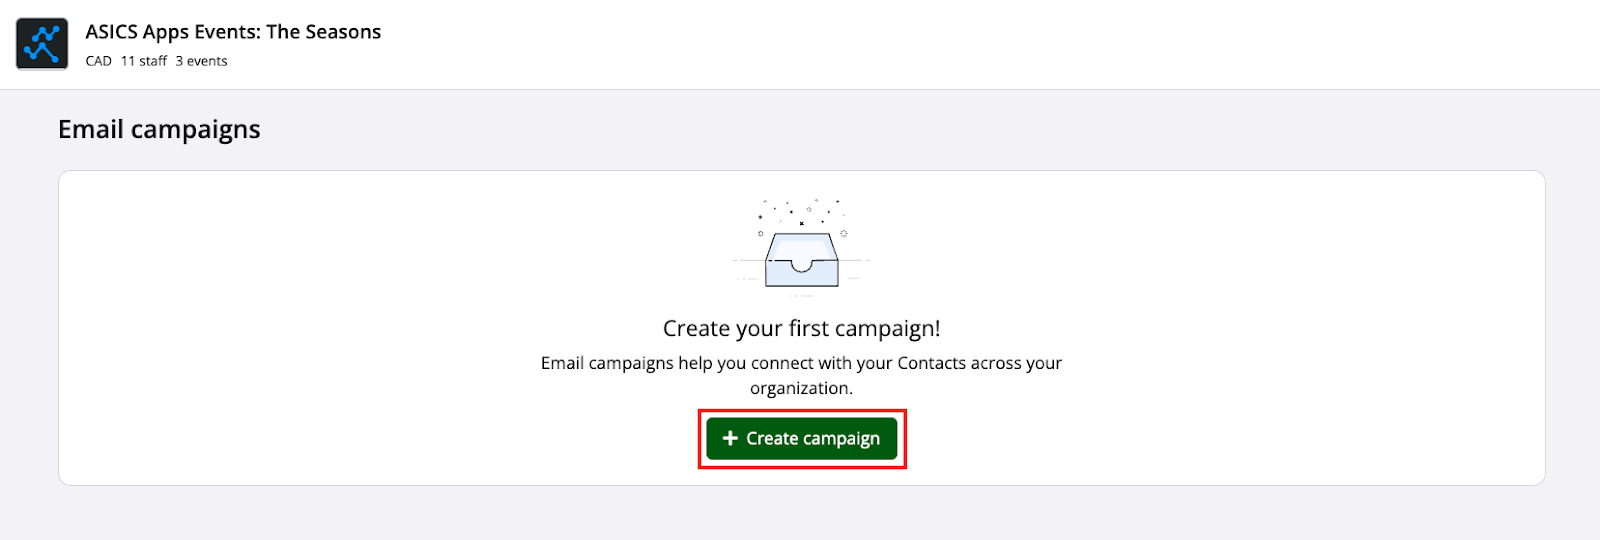
2. From the email campaigns landing page, click the green "+ Create campaign" button. Screenshot follows.
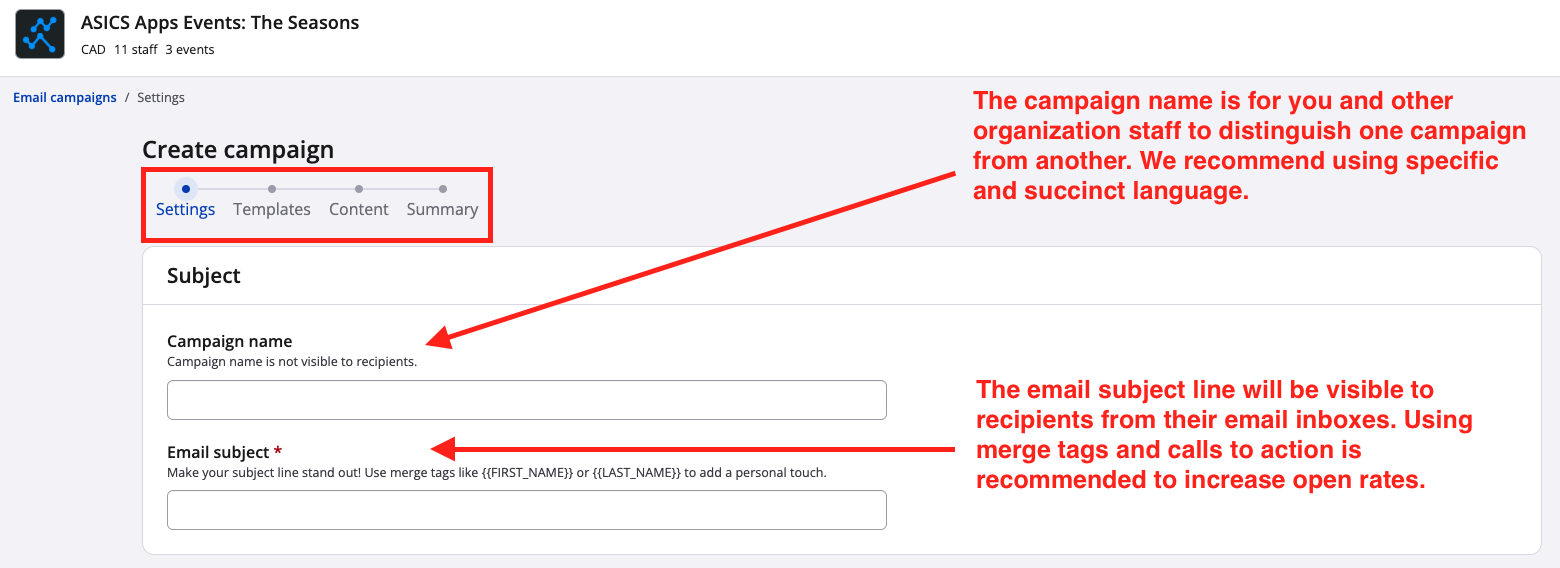
3. You have now entered the create campaign flow, to start at the Settings step. Notice that there are four steps to CRM email campaign creation (Settings, Template, Content and Summary), denoted by breadcrumbs.
Enter a name for the campaign (optional) and a subject line for the email (mandatory). If no campaign name is entered, the email subject will default as the campaign name. Screenshot follows.
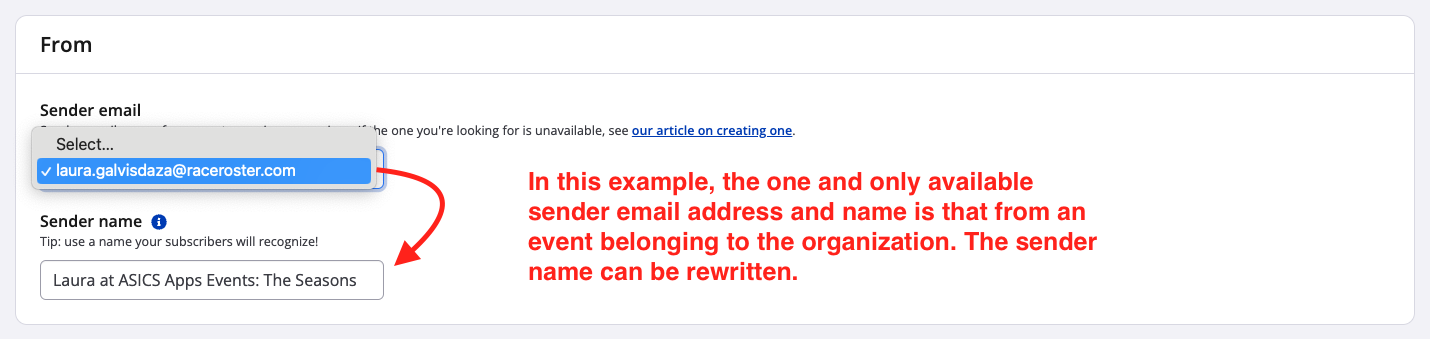
4. Next in the Settings step, select a verified sender. Then, type in the sender name that will be visible to recipients. The available senders are those created in the dashboards of events comprising your organization. Use the dropdown to select a sender email (email address) and watch how the corresponding sender name auto-populates. You may overwrite that sender name if needed. Screenshot follows.
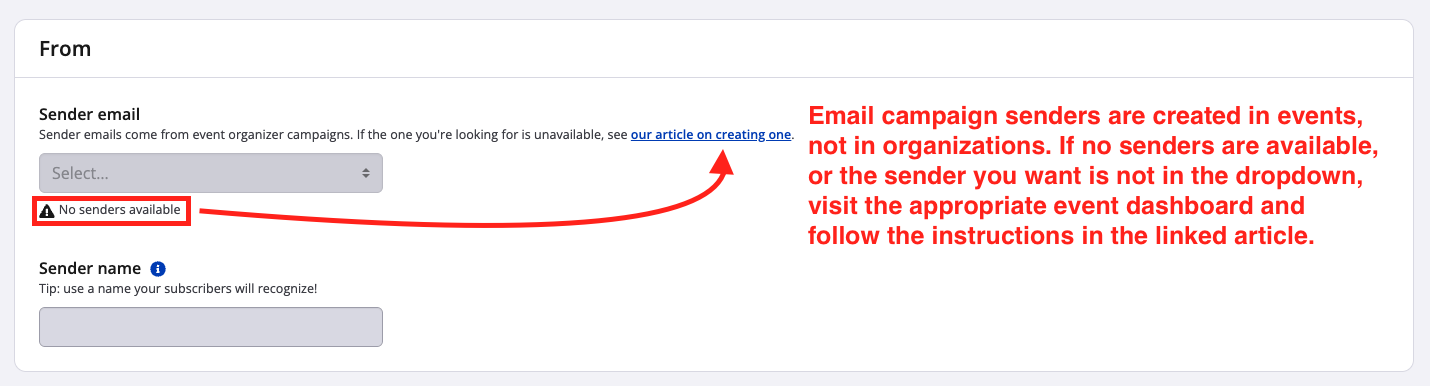
If you encounter greyed-out fields, this indicates that no verified senders exist in your organization's events. To create a sender, follow these steps in the article Adding a sender for email campaigns .
Note: As a Race Roster user, you may have previously created and verified an email sender, but if that occurred in an event outside of the organization where you are creating this campaign, you won't be able to use it and must create a new one.
Screenshot follows.
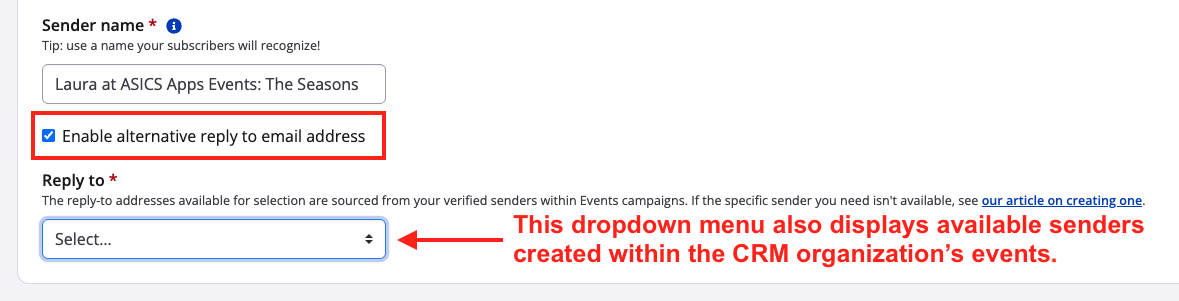
As an optional step, you may use the checkbox "Enable alternative reply to email address". This is useful in cases where you want the email campaign to be sent from email address A, but any recipient replies to be directed to a different, email address B (for example, a dedicated inbox handled by your support team). The "Reply to" email address must also have already been created as a sender in one of your CRM organization's events, just like the "Sender" email address. Screenshot follows.
If you prefer to continue with the campaign creation process, you may add the sender later.
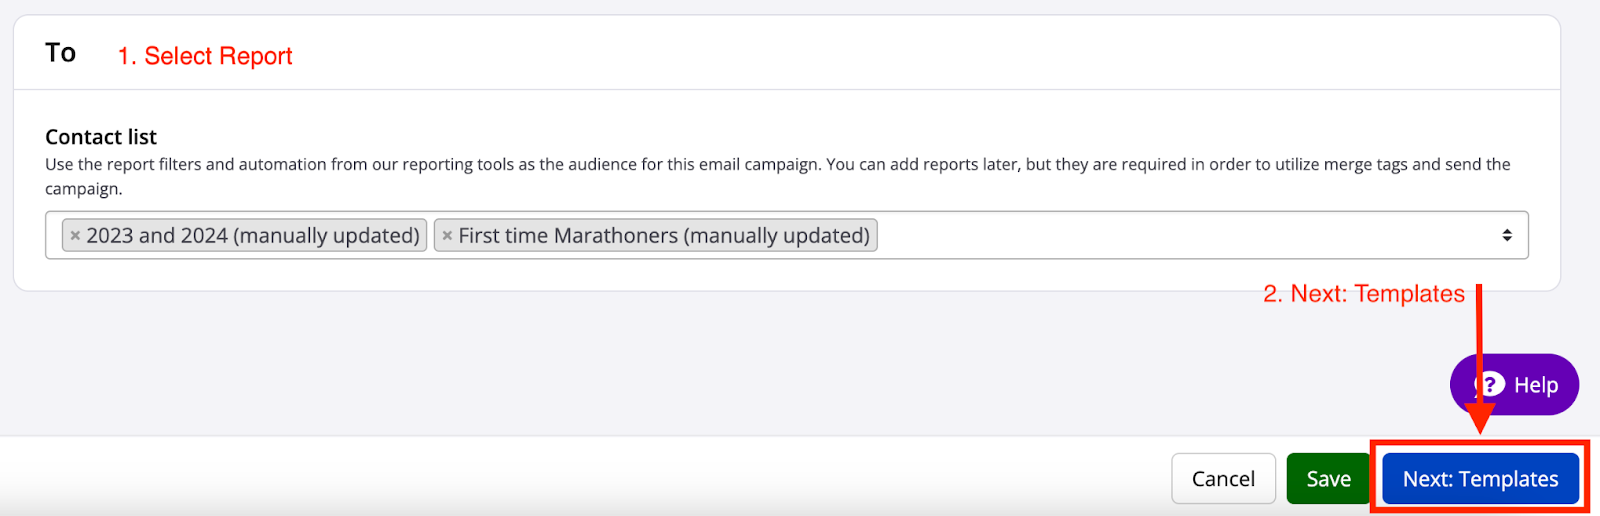
5. Finally in the Settings step, select the contact list(s) (i.e., custom reports) to which you want to send the email campaign. Don't have an eligible custom report yet? Follow the steps in our article, How to generate a custom report in my organization As mentioned above, the contact registration report type cannot be targeted in CRM email campaigns.
Note: By default, the system will deduplicate emails across the selected report(s) so that an email address only receives one email in their inbox. Yes, that means that if two contacts in the same report have the same email address (e.g., a wifeandhusband@mail.com ), only one email will reach that email inbox. This automatic deduplication was built in compliance with anti-spam legislation.
Be sure to click the "Save" or "Next: Templates" button. Screenshot follows.
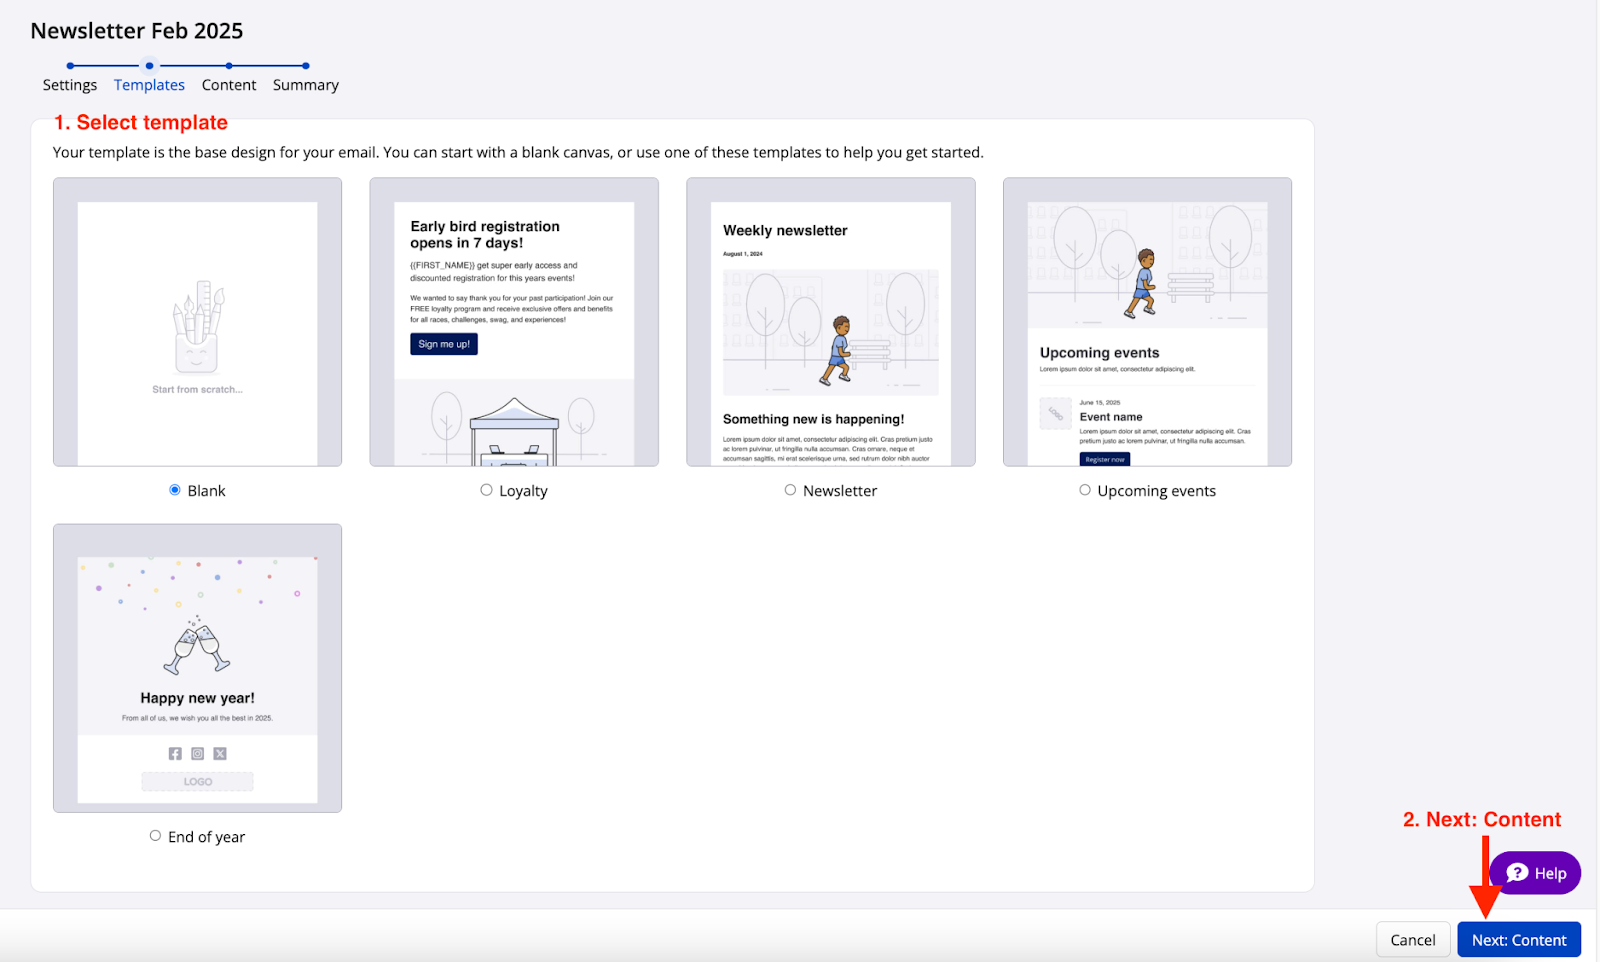
6. The next step in the email creation flow is Templates. Here, choose whether you would like to create your email from scratch or start with a Race Roster default template. Screenshot follows.
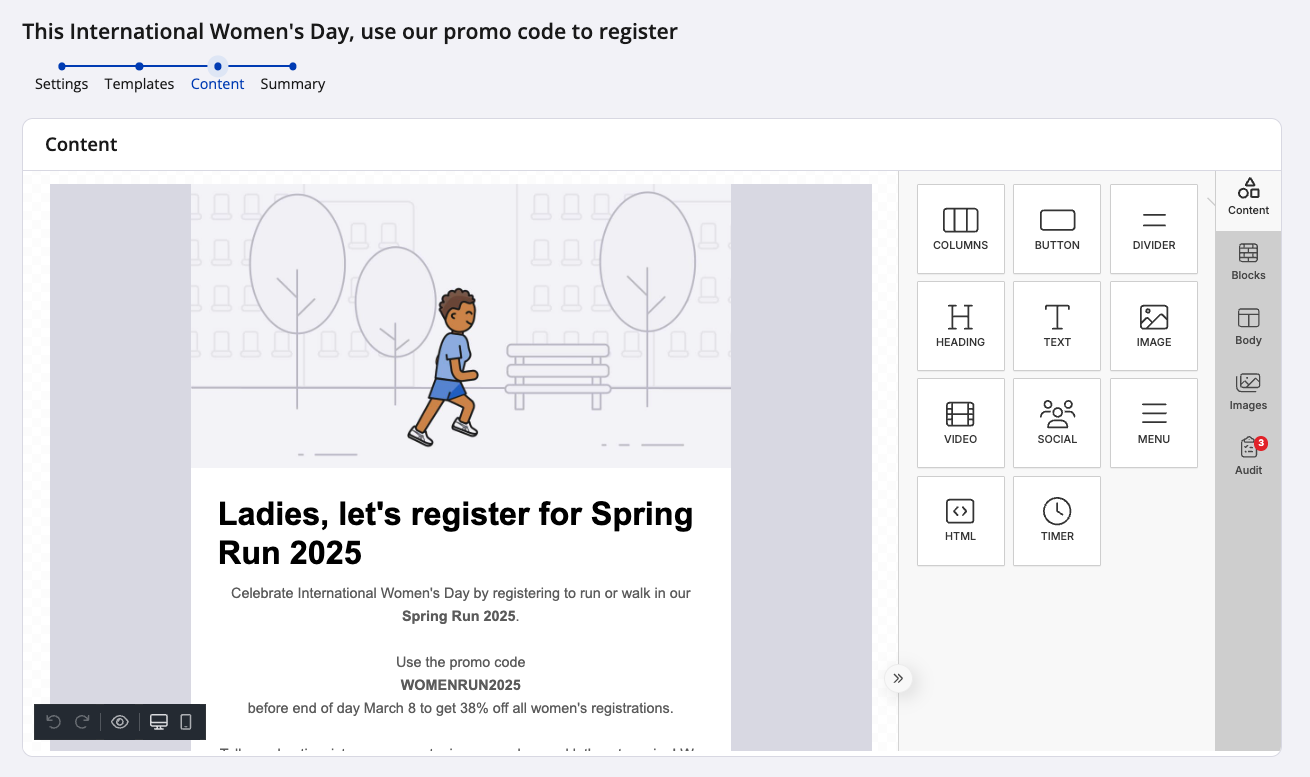
7. Once you have selected the template you want to use, you are ready to build your email by proceeding to the Content step. Creating beautiful emails has never been easier with our integration of the Unlayer email builder. In this stage, you can do a lot:
Drag-and-Drop to Add Content Blocks:
- The builder uses a simple drag-and-drop interface, allowing you to select any content block from the sidebar and drag it into your design.
- You'll find blocks like buttons, images, text, and more that can be quickly added to your email.
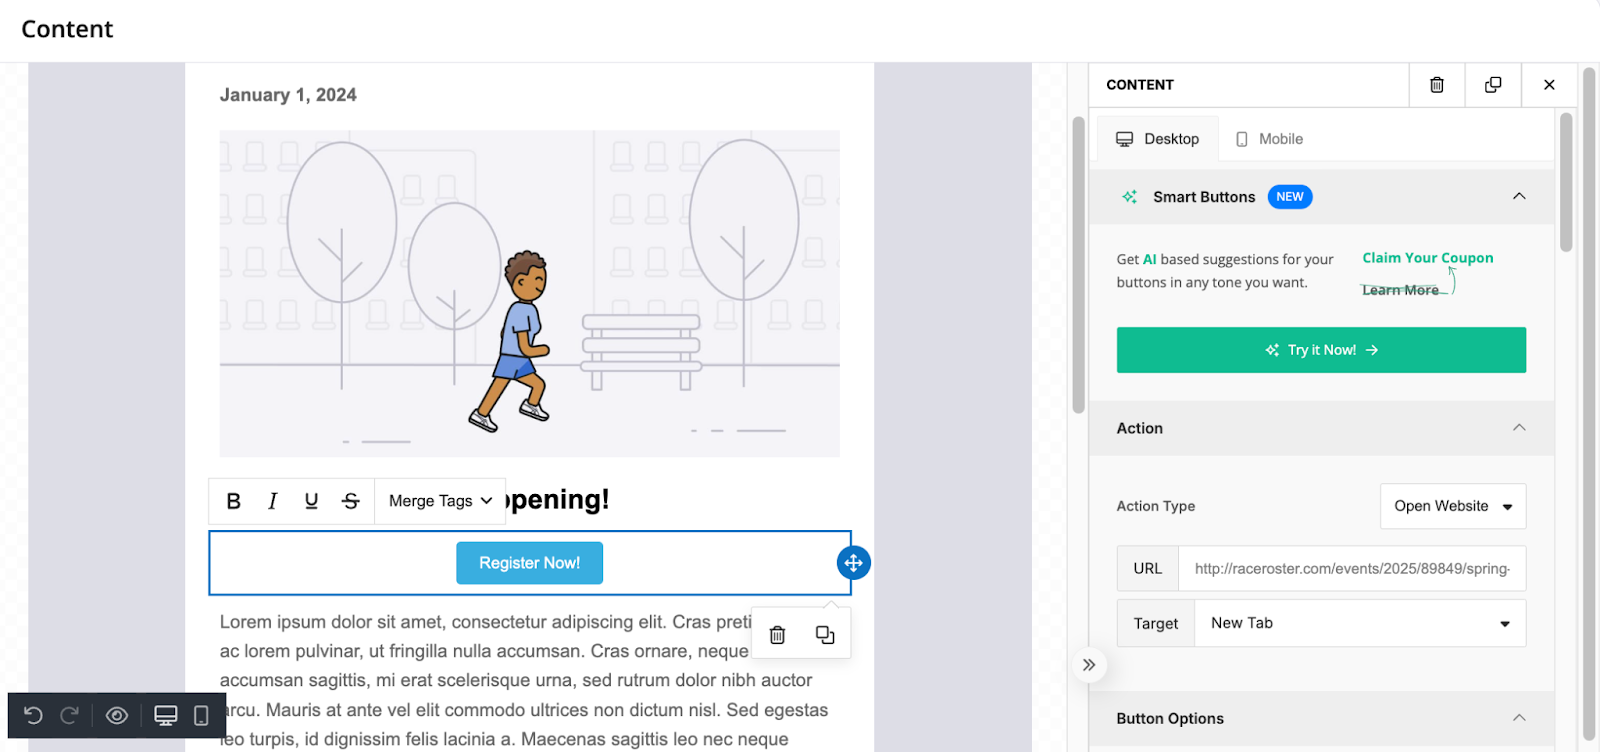
Add a Button Block:
- Drag the Button block into your email. You can customize the button's text, colour, size, and URL link.
- Once added, click the button to edit its properties. You can link it to any URL or adjust its style to match your design.
Add a Text Block:
- Add a Text block to include any content like headings, paragraphs, or lists.
- Click on the block, and you can edit the text directly. You can change the font, size, colour, and alignment to make it perfect for your campaign.
- Bonus: You can also insert merge tags in the text block. A merge tag is a dynamic placeholder, like the recipient’s first name or other personalized info, which will be automatically filled in when you send your email. Simply click the merge tag button and select the data you want to insert. This includes:
- First Name -
- Last Name -
- Email Address -

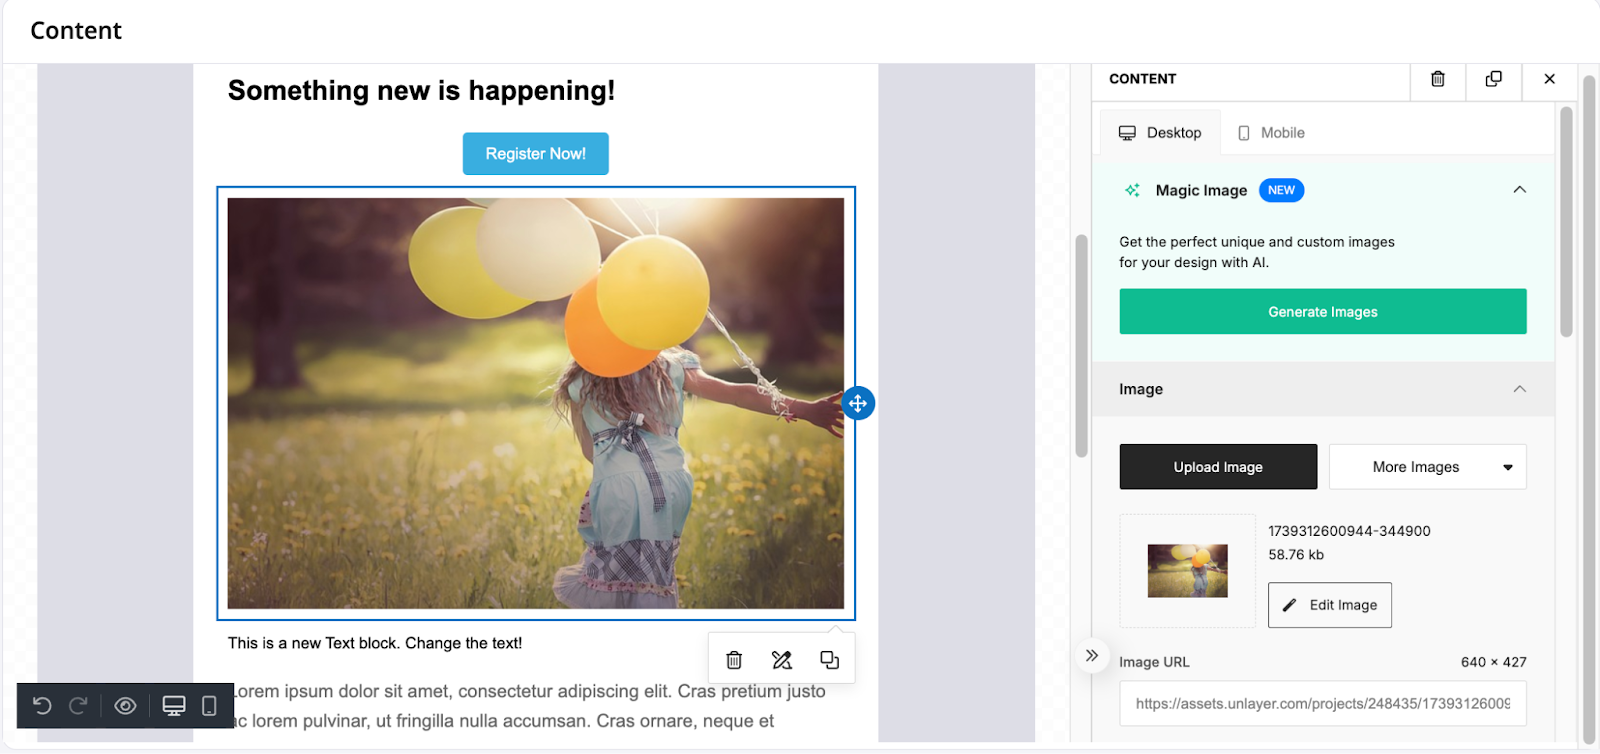
Insert an Image:
- Drag an Image block into your design to add photos, logos, product images, or artistic designs.
- Click the image block to upload an image file from your computer or choose from available images on the platform. Resize it as needed by dragging the corners.
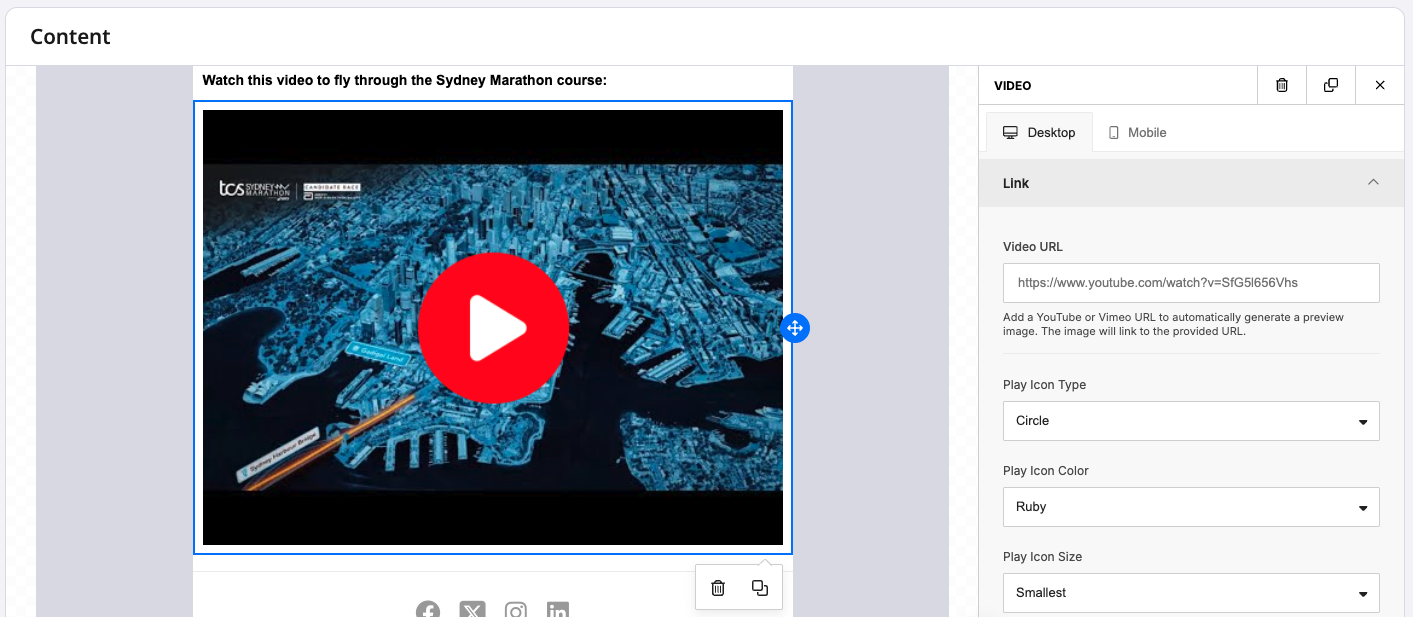
Insert a Video:
- Drag a Video block into your design to add a thumbnail and link to an online video or reel.
- YouTube, Vimeo, Vidyard and many other third party video sharing platforms are compatible. Just paste the video URL and tweak the icon and action settings to showcase this kind of content.
- Use cases include promotional videos about upcoming events; testimonial and impact videos about past events; interview reels of staff, volunteers and recurring participants; tutorials about procedures; etc.
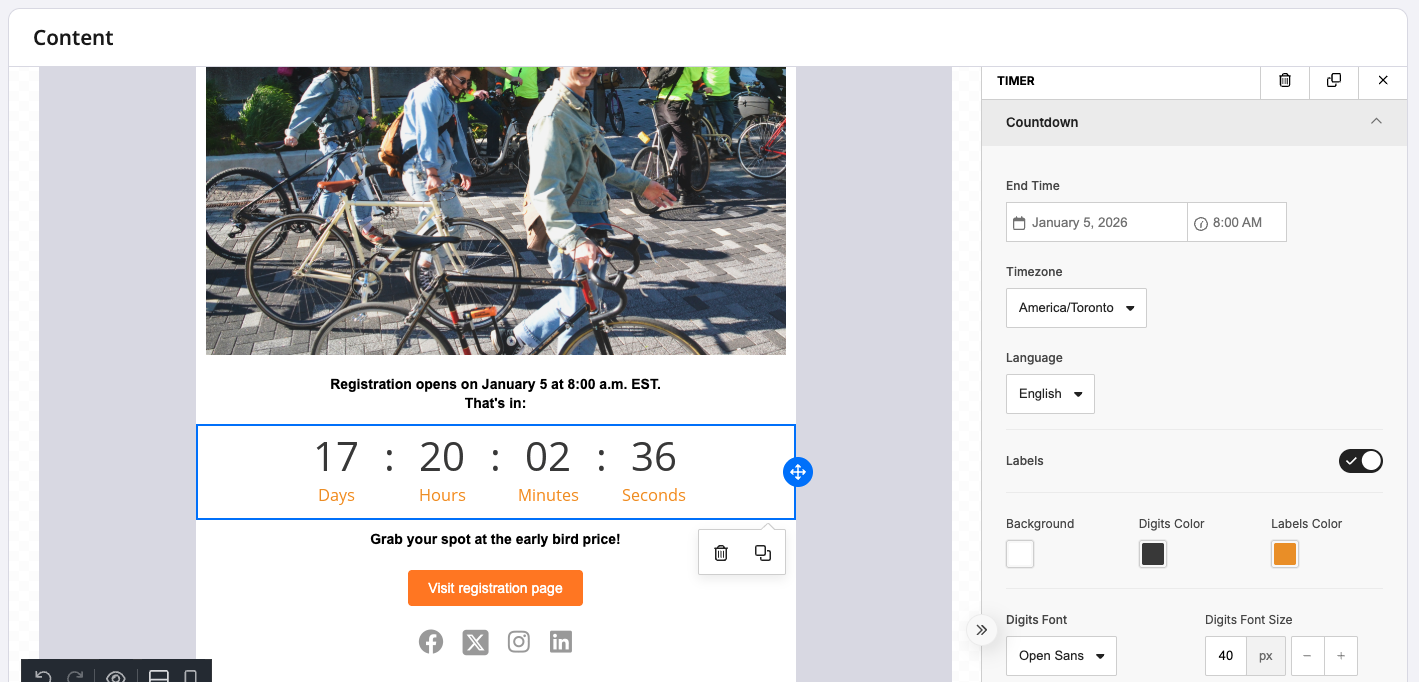
Add a Timer (i.e., Countdown):
- Drag a Timer block into your design to add a widget displaying an automatic countdown.
- Set your end date and time, timezone, and edit details such as labels, color, font, and size.
- Use this to create a sense of excitement or urgency for your audience, whether for the date that an event registration opens, the event date itself, when a sale starts or ends, and the like.
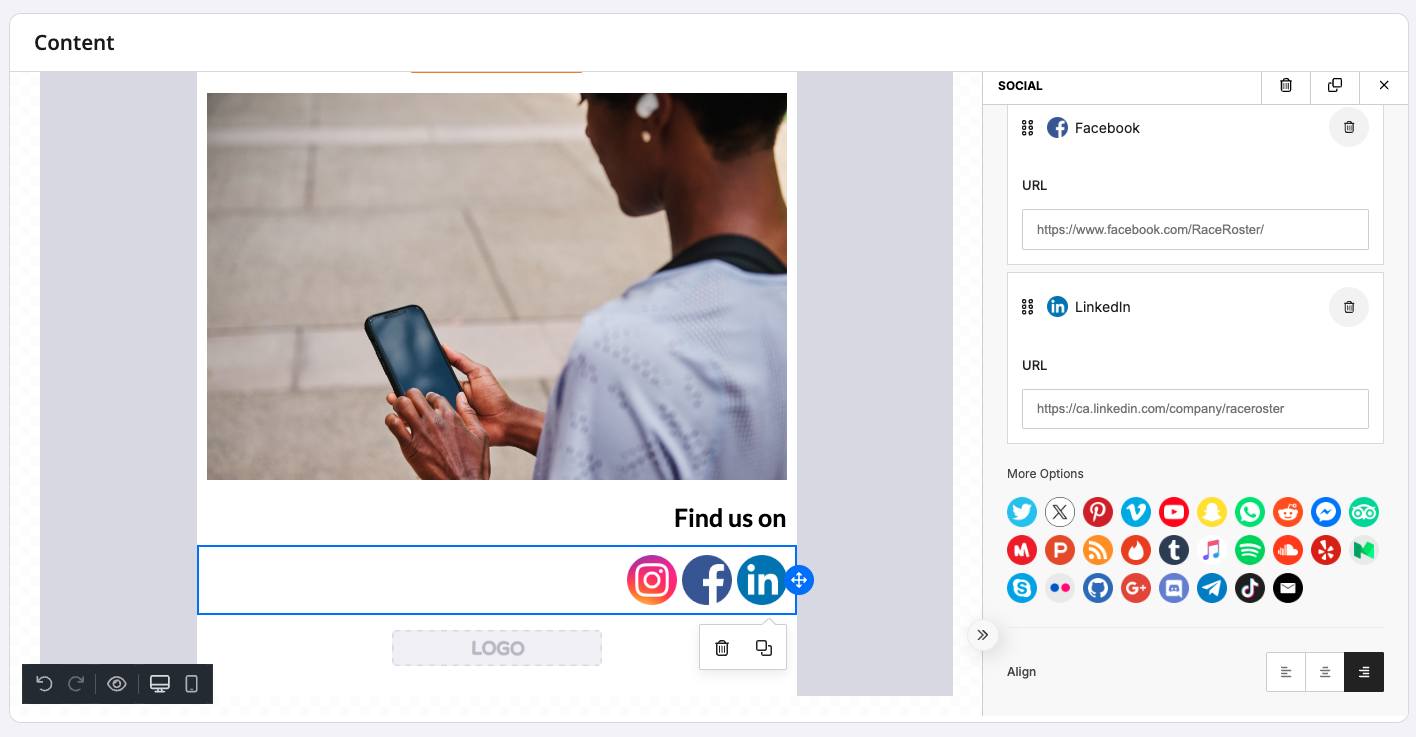
Link to Your Social Media Accounts:
- Add the Social block and choose which social media accounts to link within your campaign.
- No logo upload needed on your end. Select from over two dozen third party website and app options, with official icons preloaded, and settings to help match your brand (minimalist or full color, small or large, square or circle, etc).
- Insert the URLs to your accounts for easy, one-click access for email recipients.
- Showcase your social media content and gain more followers.
Audit tool:
- This built-in audit flags potentials problems with your campaign (for example, empty links) and suggests improvements related to compliance and quality standards.
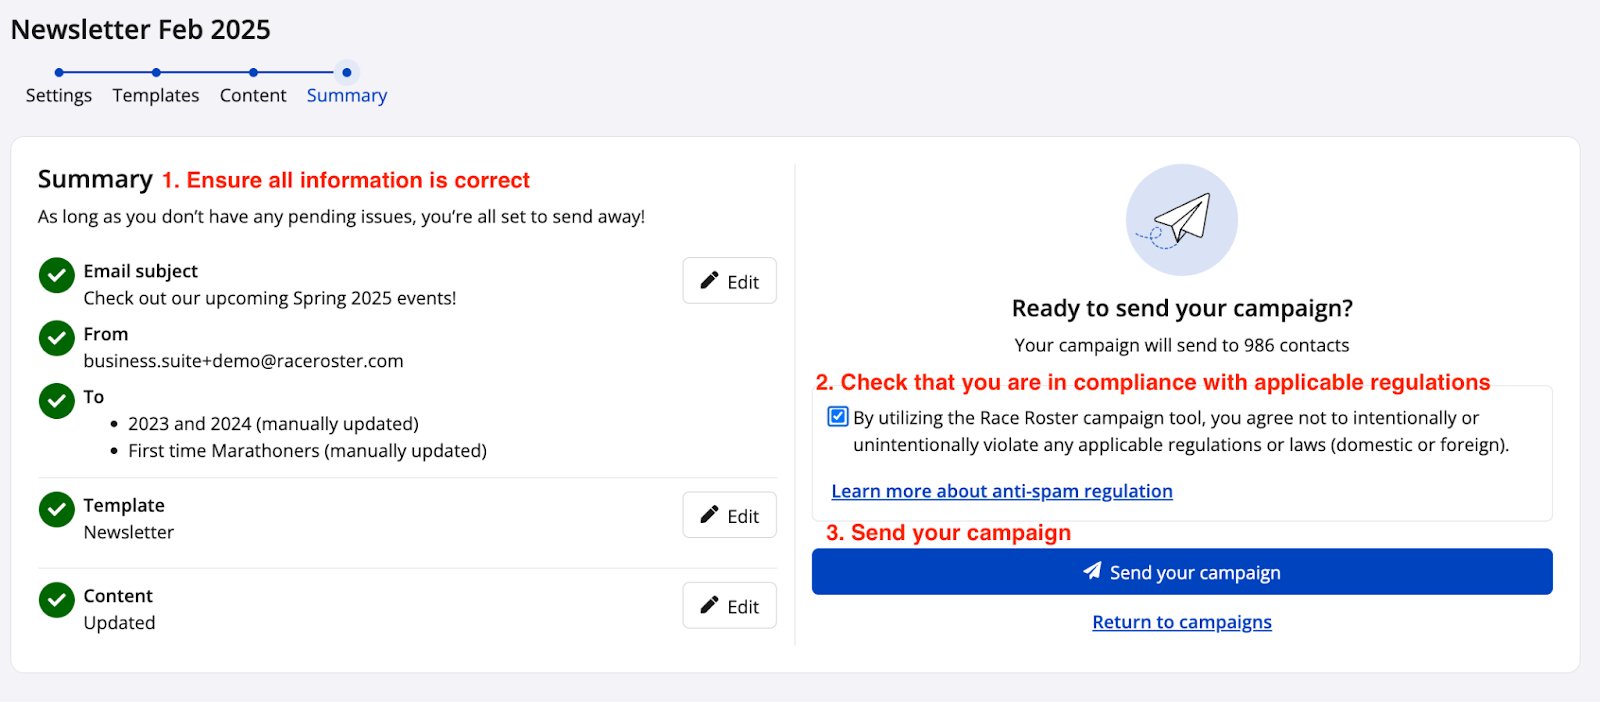
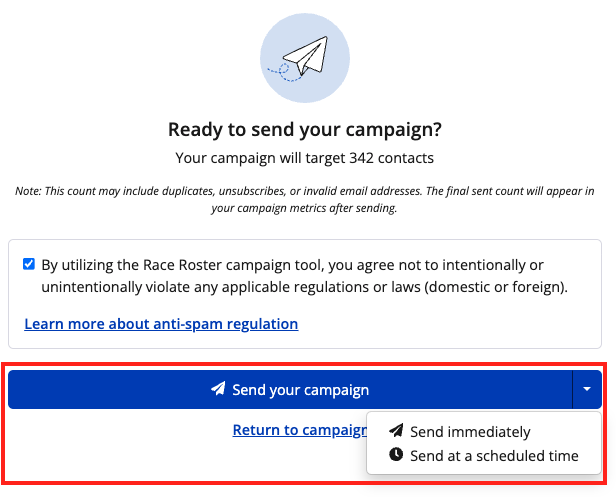
8. The final step in the email campaign flow is the Summary stage. Here, you will verify all the information from the previous steps are correct and your email is good to go. Green checkmarks indicate the information provided is accepted while red Xs indicate that fields require attention before proceeding with the send.
Note: Before you can send an email you must check the box verifying that you are acting in accordance with anti-spam legislation.
Screenshot follows.
You may choose to send the campaign immediately, or to schedule the send. Choose one or the other from the dropdown menu off the blue "Send your campaign" button. Screenshot follows.
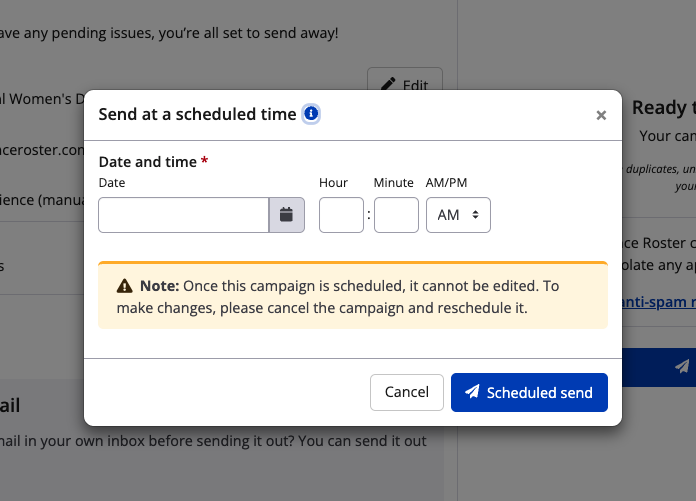
If you choose to "Send at a scheduled time", a modal will open where you may indicate the future date and time before clicking the blue "Scheduled send" button. Please note that the organizational time zone is in effect. Screenshot follows.
If you choose to "Send immediately", a modal will open prompting for confirmation. If you are satisfied with the information you have provided and feel your email is ready to be sent to its intended audience you can now click the blue “Send campaign" button. Screenshot follows.
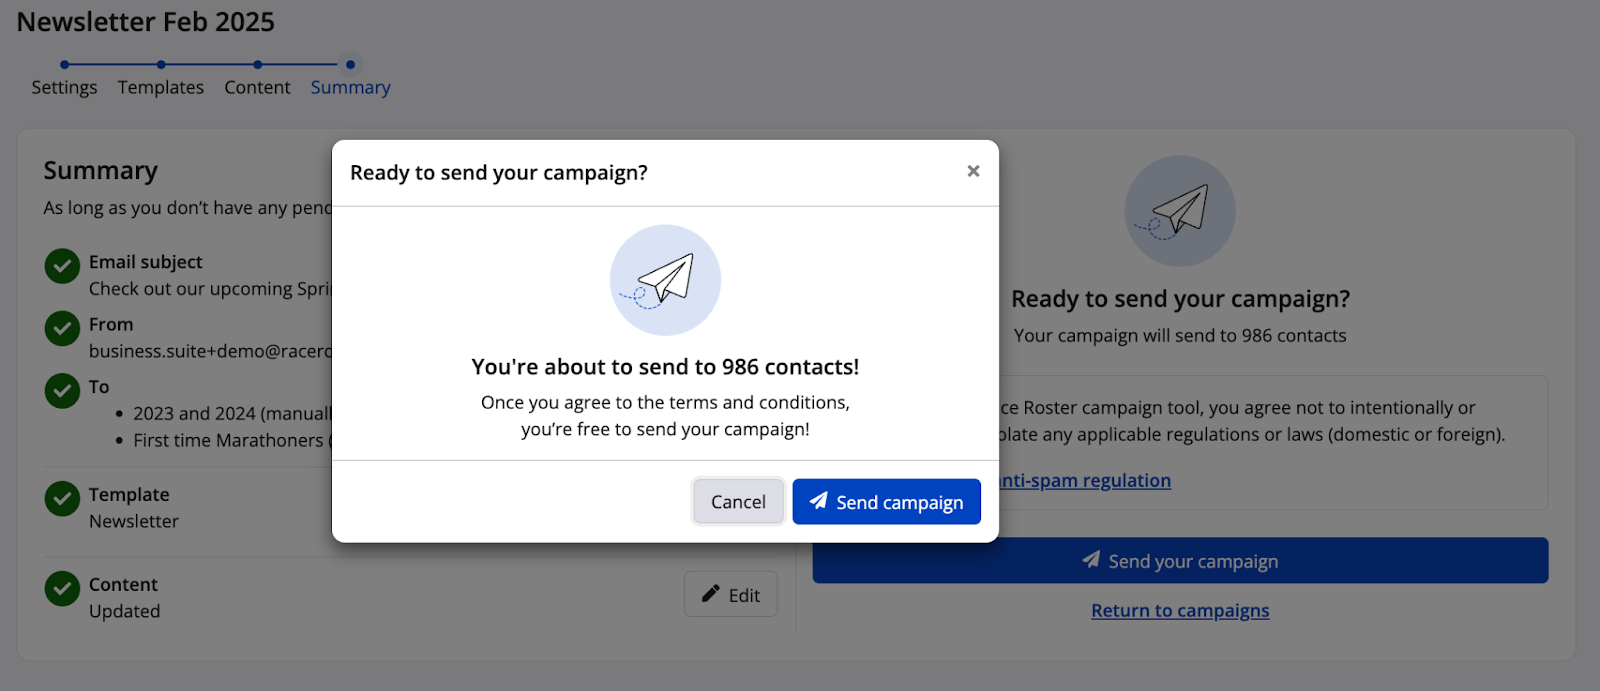
Congratulations, you’ve sent your first CRM email campaign!
Metrics
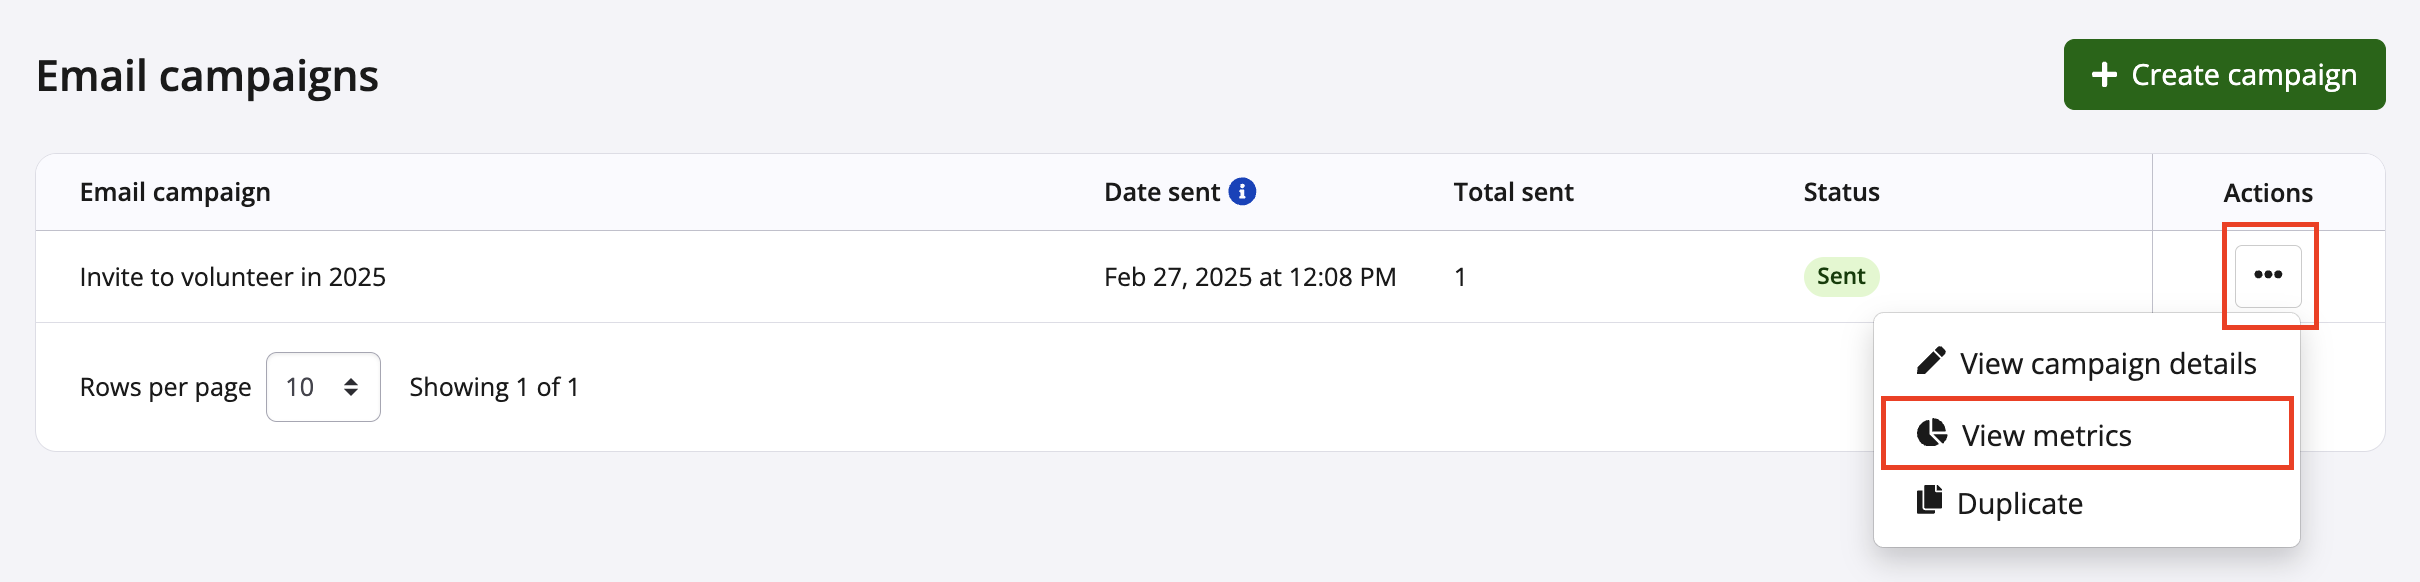
Back on the email campaigns landing page, your campaign will be listed with "Sent" as its status. To view information about its delivery rates, you may click the Actions "..." button and select "View metrics" from the dropdown menu. Screenshot follows.
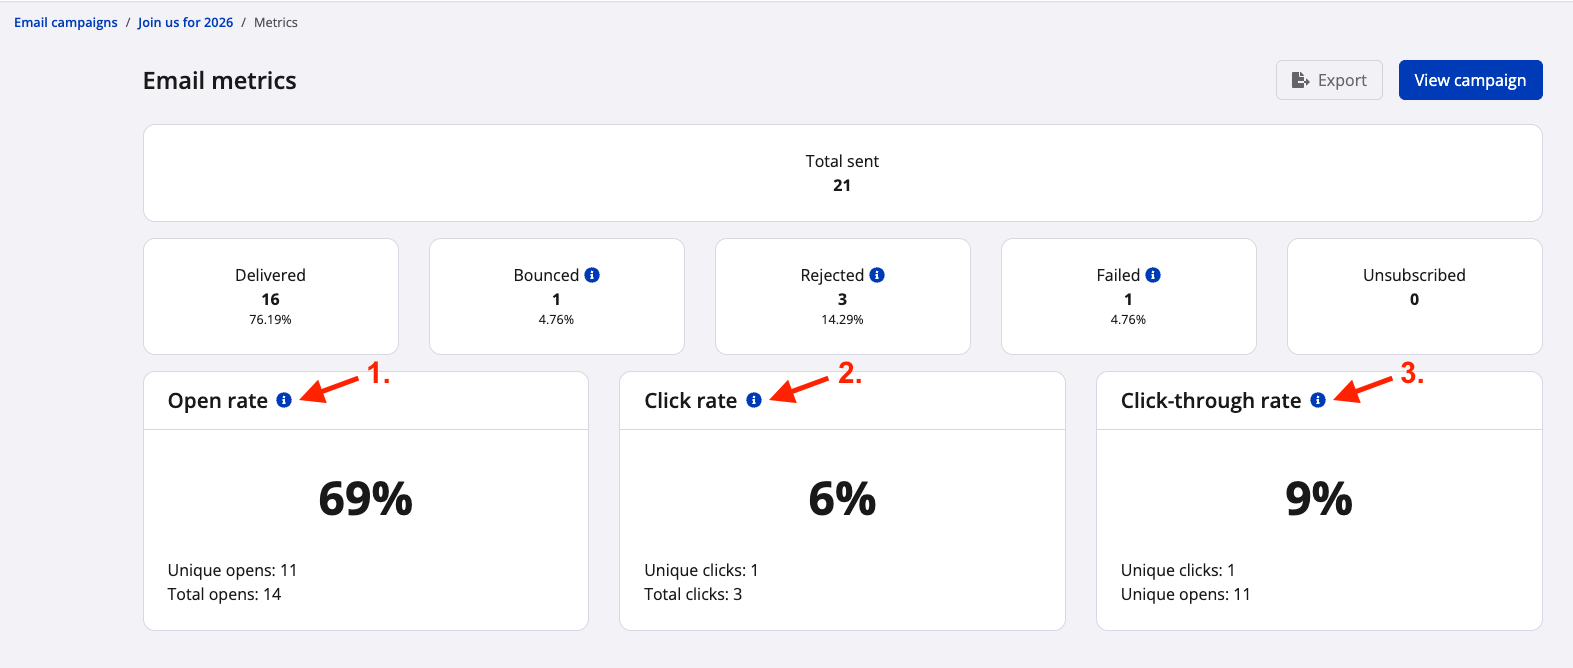
On the email metrics page, for the specific email campaign, you will be able to see the number of emails that have
- been delivered
- bounced (A bounced email couldn't reach the recipient's inbox. This happens if the email address is invalid, the inbox is full, or server rejects it.)
- been rejected (A rejected email wasn't delivered because the recipient's server refused it. This could be due to spam filters, server rules, or other security measures.)
- resulted in a contact becoming unsubscribed
- failed to send (A failed email couldn't be sent due to an invalid mailing address. This could be due to a missing email address or the email has unsubscribed from your mailing list prior to the send.)
Click the blue "i" icon to learn more information about select categories. See screenshot below.

In addition:
- The open rate shows the percentage for recipients who open your email. It helps you gauge how well your subject line and sender name grab attention. Just remember, privacy settings and email clients can sometimes affect accuracy!
- Click rate measures the percentage of delivered emails where recipients clicked on any link. It provides a broader view of overall campaign engagement by showing how many delivered emails resulted in at least one click.
- Click-through rate (CTR) measures the percentage of recipients who clicked a specific link out of those who opened the email. It helps you assess the effectiveness of individual call-to-actions within your email.
See screenshot below.
You may also use the "Export" button to download a .csv spreadsheet file with the full campaign metrics report. The file will show all the contacts sent to along with statutes for the send (delivered, bounced, rejected, failed, and/or unsubscribed).
If you have any questions about creating a CRM email campaign or analyzing its metrics, please contact our support team via director@raceroster.com (director@raceroster.com.au).