At Race Roster, we use the terms "event" and "event page" to refer to the entire event experience comprised by a single page on our platform. An event has a unique 5 or 6-digit event identification number (EID). This EID will have its own settings, data and reports that are visible from the event dashboard, all corresponding to the event page.
We use the term "sub-event" to denote a category of registration for the event. Here are some examples of events and their sub-events:
- You're organizing a 10 mile community bike ride (the event). You want a single, standard registration procedure per person, at no cost. So, you create one free sub-event:
"10 mi Bike Ride"
- You're organizing a charity 5K run in support of a veterans resource centre (the event). You want to offer options for pricing. So, you create three sub-events:
"5K Run - General Public" (full price)
"5K Run - Veteran" (discounted price to self-identifying veterans)
"5K Run - Fundraiser" (charge-later, with charge voided if the participant fundraises to a minimum amount)
- You're organizing a multi-sport race festival (the event). You want to charge different pricing depending on the distance and exact sport. So, you create 7 sub-events each with its own pricing strategy:
"Sprint Triathlon"
"Olympic Triathlon"
"Team Relay Sprint Triathlon"
"Team Relay Olympic Triathlon"
"Duathlon"
"Aquabike"
"Aquathlon"
The sub-event is the building block of participant data. Specific products, registration questions, team categories, start groups, fundraising permissions, waivers, discounts and other features can be configured on a per-sub-event basis. Creating sub-events is one of the seven required steps to take an event page live. Without at least one sub-event, participants cannot complete registrations on your event page.
To learn how to create sub-events on your event, please follow the steps below.
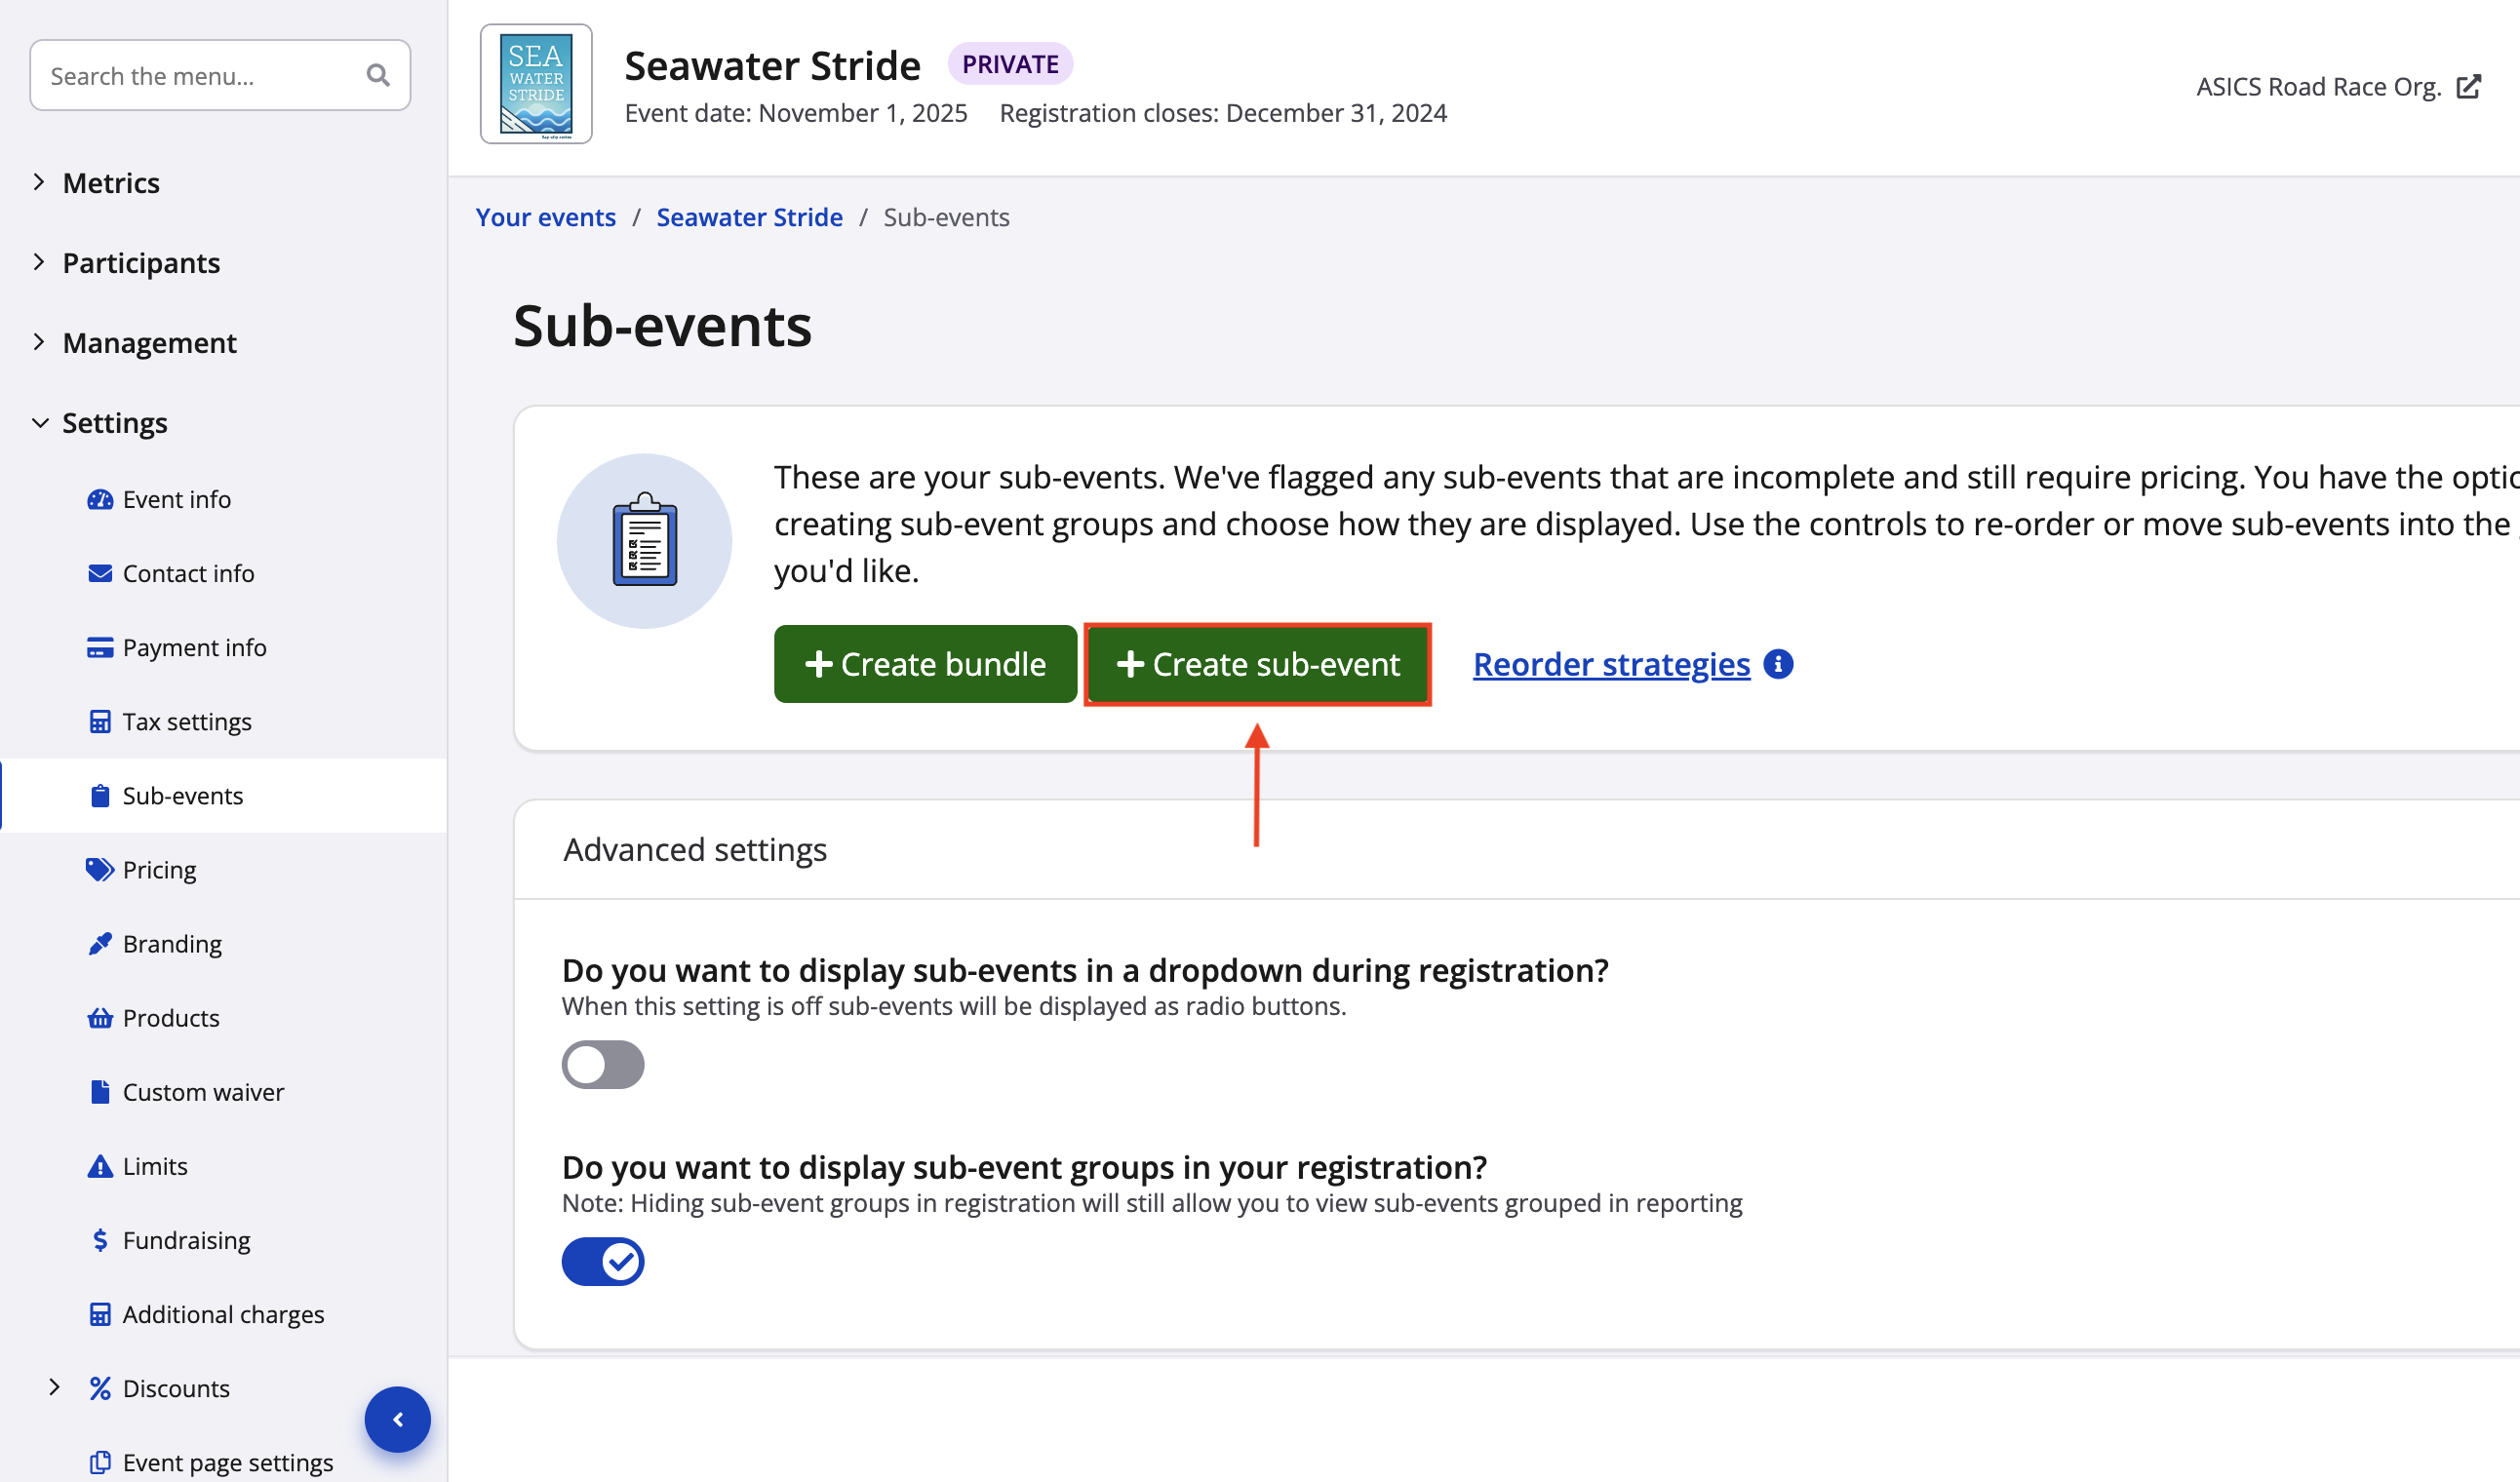
1. From your event dashboard, click on Settings > Sub-events.

2. If the EID is brand new, you will be redirected to the sub-event creation page (step 3 below). If you have existing sub-events, click the green "+ Create sub-event" button to begin with a new one.
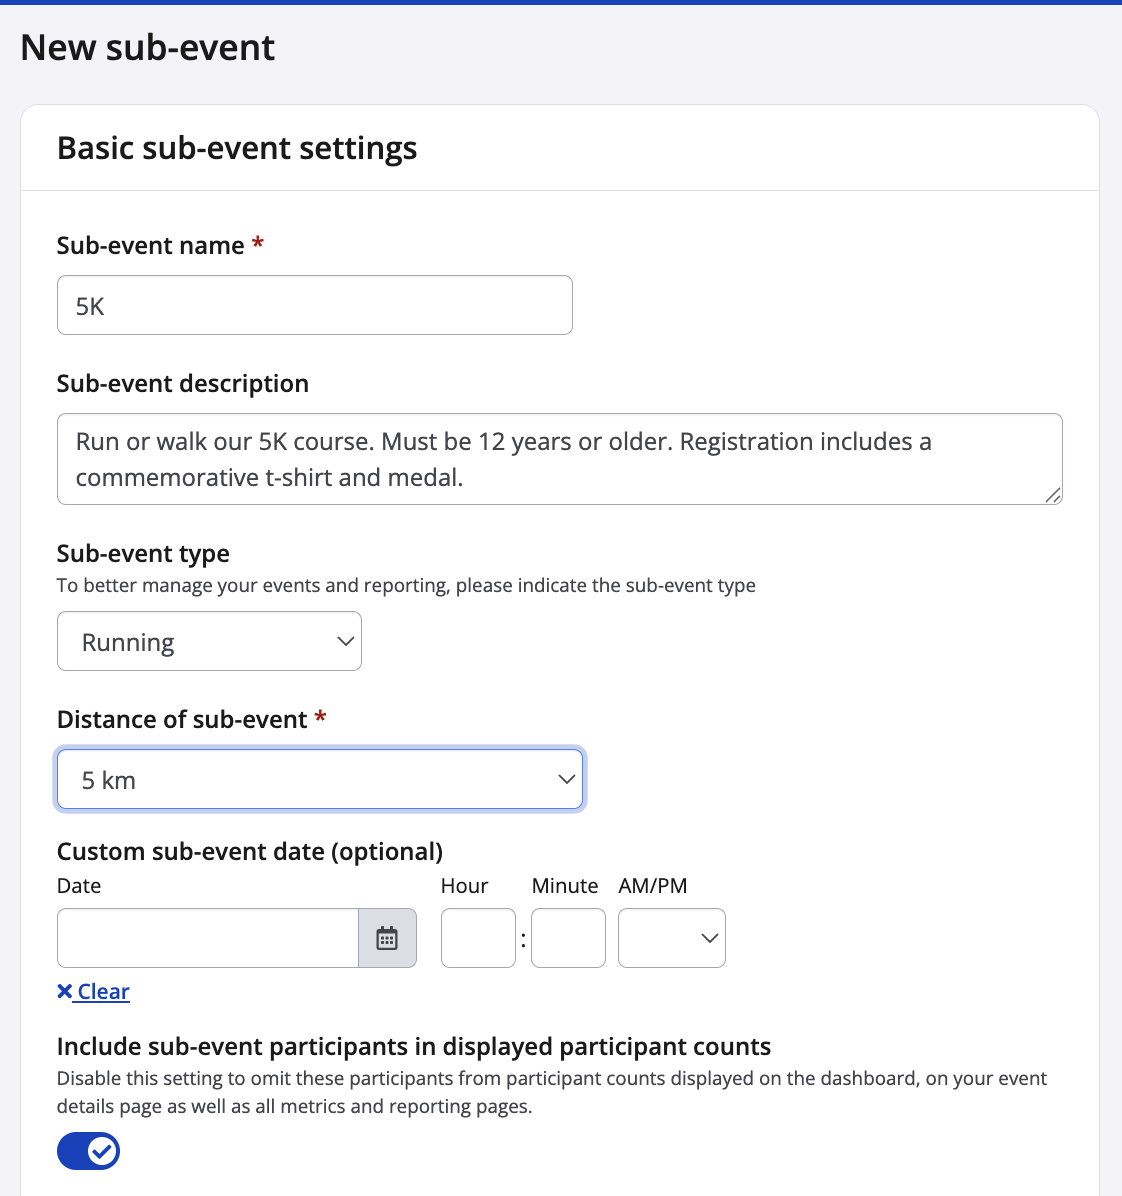
3. Complete the basic sub-event settings section. Some fields are mandatory while others are only recommended or optional.
- Sub-event name - This appears clearly on the event details page, registration form, confirmation email, participant dashboard and other locations. We recommend specifying on the sport and distance (e.g., "5K Run/Walk", "10K Run", "Half Marathon", "Sprint Triathlon"). If useful, you may include other wording in the name, like intended registrants or sponsoring companies (e.g., "5K Run - Veteran Registration", "ASICS 10K Run").
- Sub-event description (recommended) - This appears in the registration fees section of event details page, as well as on the registration form (scroll down to step 8 for the two display options). We recommend succinct wording about what is included in pricing (e.g., participant t-shirt, shuttle bus ride), what registrants can expect on event day (e.g., start time and location) and/or any other information that helps registrants choose one sub-event over another or feel confident about what they are registering for.
- Sub-event type (recommended) - This helps index your event and sub-events in Race Roster's public event search . By selecting a sub-event type (e.g., running, cycling, virtual walking, etc.), prospective participants looking for this specific type of event in their area will be able to find it more easily.
- Distance of sub-event - This also helps index your event and sub-events in Race Roster's public event search.
- Custom sub-event date (optional) - This appears in the confirmation email and link. Insert a custom sub-event date if the sub-event has a separate date from that within the event info settings, or if yours is a multi-date event and want to specify when this distance/sport will take place.
- Include sub-event participants in displayed participant counts - This toggle allows you to include or exclude sub-event totals from being counted towards your overall participant count. The count is viewable from the event dashboard overview, and from the event page if you enable its visibility from event info.
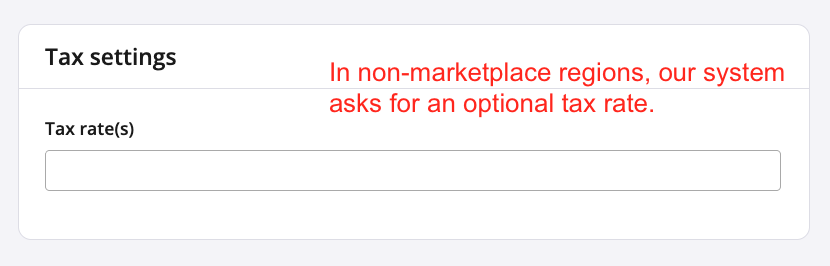
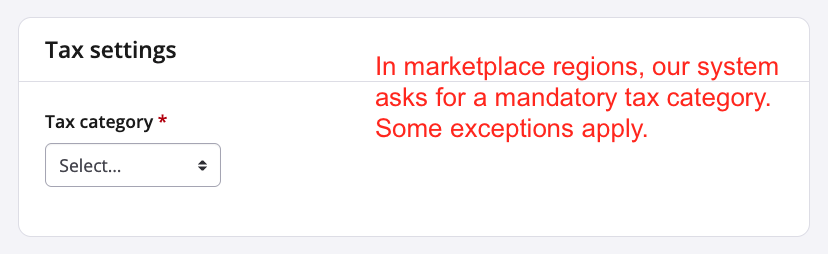
4. In the tax settings section, select the tax rate or category that applies to the sub-event. More information can be found in our other articles:
5. In the age settings section, you may establish minimum and/or maximum ages for the sub-event when needed.
- For example, you may have a sub-event called "1 Mile Kids Fun Run" intended for children ages 5 to 15, or one called "Full Marathon" only for runners age 17 or older.
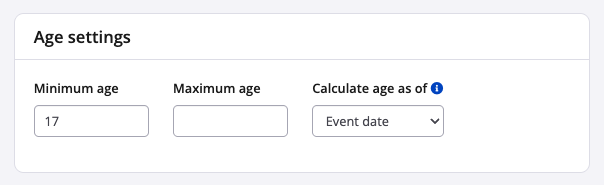
If using these settings, be sure to indicate how to calculate the age. Any registrant that doesn't meet the age settings based on their Date of Birth input will receive a message barring them from proceeding.
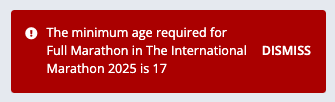
6. You may use the restriction and validation settings section for fine-tuned control of who can register for the sub-event.
- Restrict access to this sub-event: When enabled, this toggle locks the sub-event from the general public. In order to register, the use of an access code is required. An access code may be distributed to a select person or group of people.
- Require validation: This setting allows you control who registers for the sub-event by way of a validation list (i.e., only those on the list may proceed to register for the sub-event).
-
-
To enable this feature, you must complete the preliminary step of uploading a validation list to the event's owning organization .
-
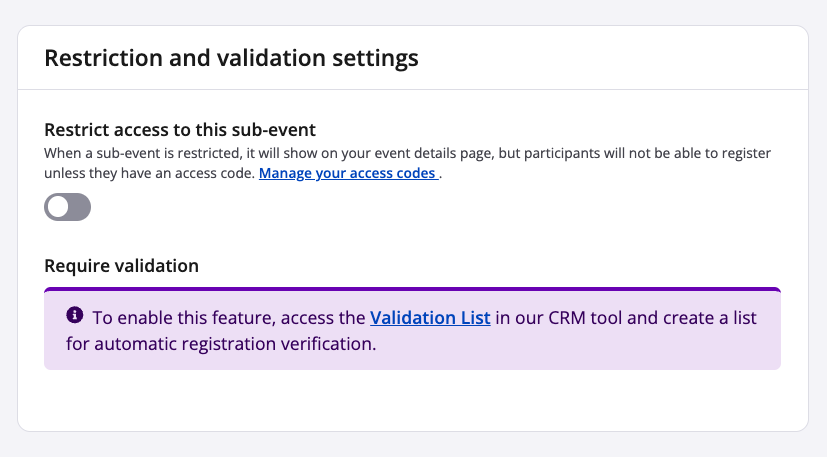
Once enabled, use the fields to establish these settings:
Validation lists: Select the list(s) against which you want to validate the sub-event registration (e.g., pre-approved elite runners, employees of company, members of a club). Warning: all lists selected within this field must have uploaded the exact same data columns.
Data columns: Choose which data columns (i.e., pieces of information) will be used to validate participants against during registration. Warning: The column checkboxes selected must match the exact data columns available on the validation list(s). For example, if the validation list was uploaded to the owning organization to feature "First name", "Last name" and "Date of birth", then all three of those must be selected here in the sub-event's validation data column checkboxes.
Start date (optional): Choose a date on which the sub-event begins validating against the list. For example, if the sub-event is almost sold out and you want to reserve the final few spots to company employees, you may use this setting to enable validation only for those on the employee list.
End date (optional): Choose a date on which the sub-event stops validating against the list. For example, if you launch registration for a gran fondo and want to reserve early bird registration to your cycling club members (say, until end of day on September 20), you may use this setting so that the "TVP Club Members" validation on the sub-event ends that day. Afterward, validation will no longer be required for the sub-event and the public can register, too.
-
-
7. Click to save your changes!
- "Save" will save changes and keep you on that individual sub-event's settings
- "Save & add another" will save changes and bring you to a new sub-event creation process
- "Save & exit" will save changes and bring you back to the main sub-event settings page where all sub-events are listed and/or grouped
8. Back at the main sub-event settings page, notice the two advanced settings toggles (screenshot follows).
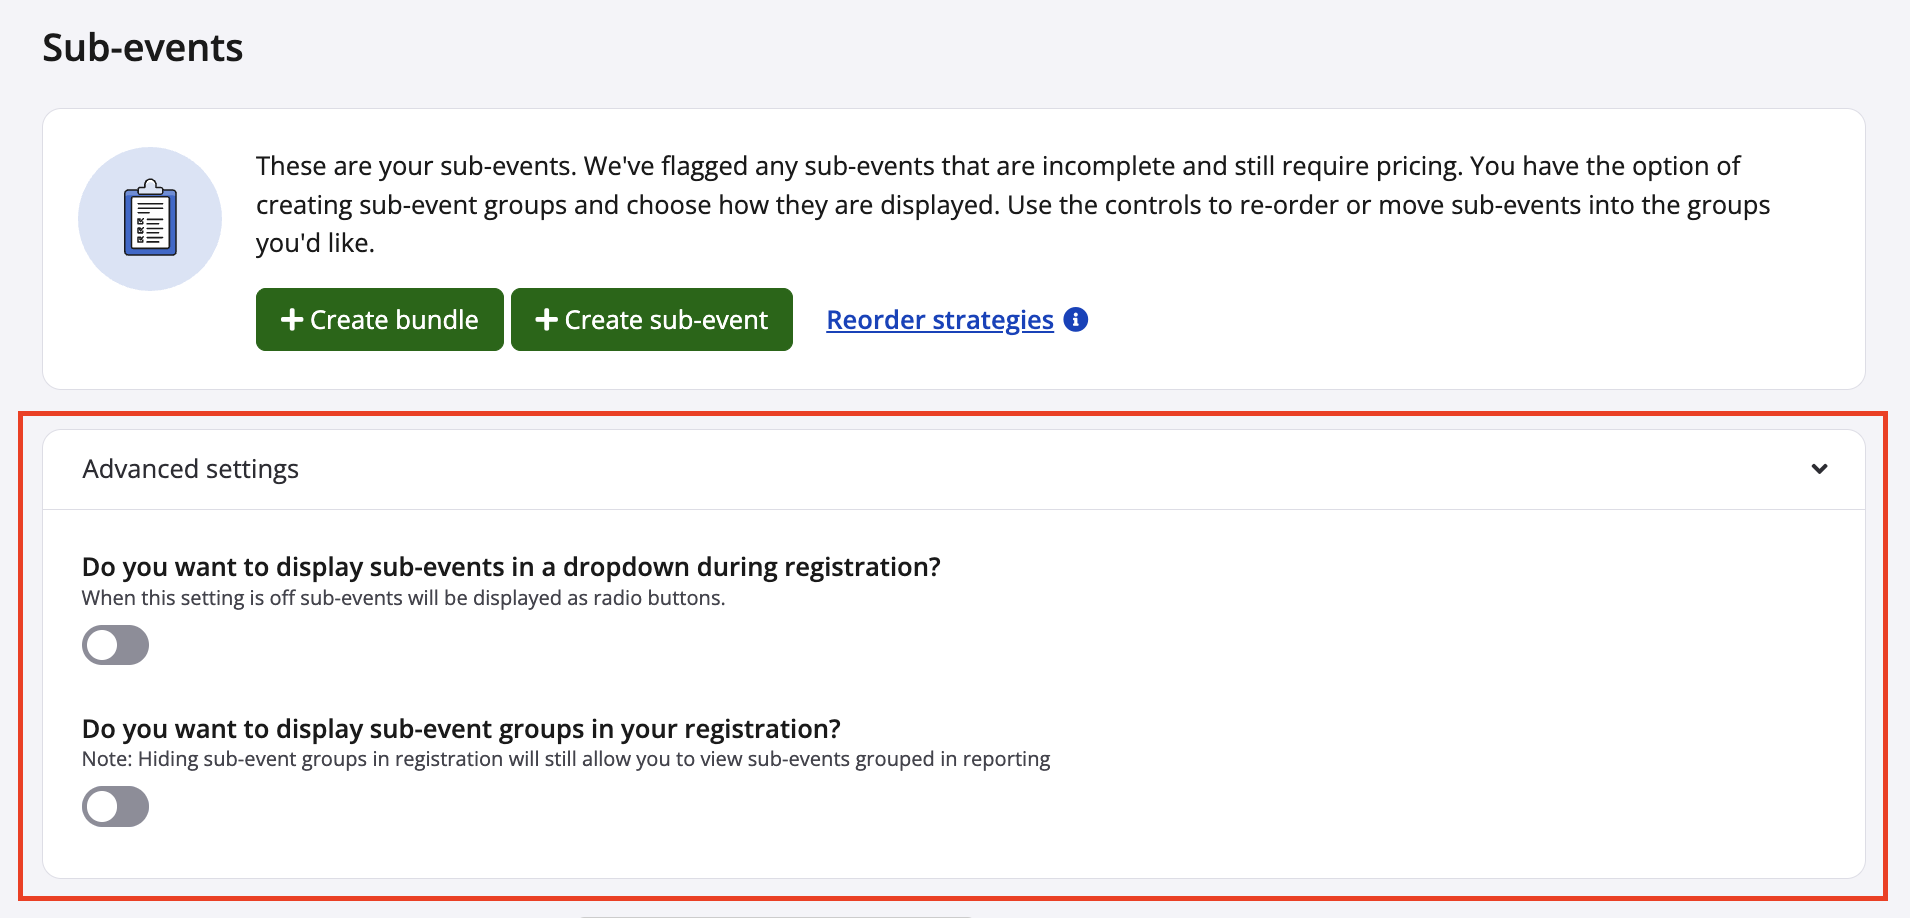
- Do you want to display sub-events in a dropdown during registration?
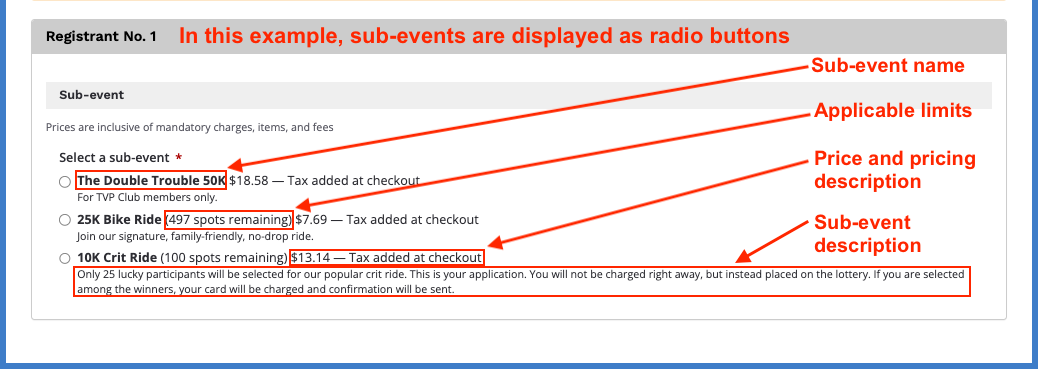
- toggle off: sub-events are displayed as radio buttons; the sub-event name and (if applicable) limits, price and pricing description will be on one line; its corresponding sub-event description (if any) displays as the next paragraph
- toggle on: sub-events are displayed as a dropdown menu; the sub-event name and (if applicable) limits, price, pricing description and sub-event description will all have to fit in one menu line (therefore, it's best for very short descriptions)
Screenshot follow to display registration with radio buttons and as a dropdown menu:

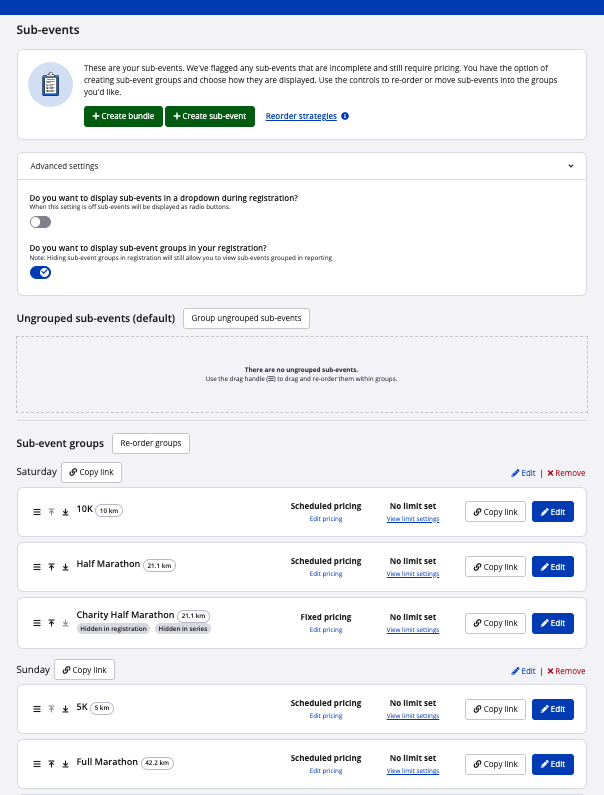
- Do you want to display sub-event groups in your registration?
- learn more about sub-event groups in our other article
9. Whenever you visit the sub-event settings page, you will see all toggles, sub-events (with their respective Smart Links , pricing strategies , and limits ), sub-event groups, and the like displaying accordingly. Screenshot follows:
If you have any questions about creating sub-events, please contact us at director@raceroster.com (director@raceroster.com.au).