This article is being rewritten. Check back later.
Preliminary information
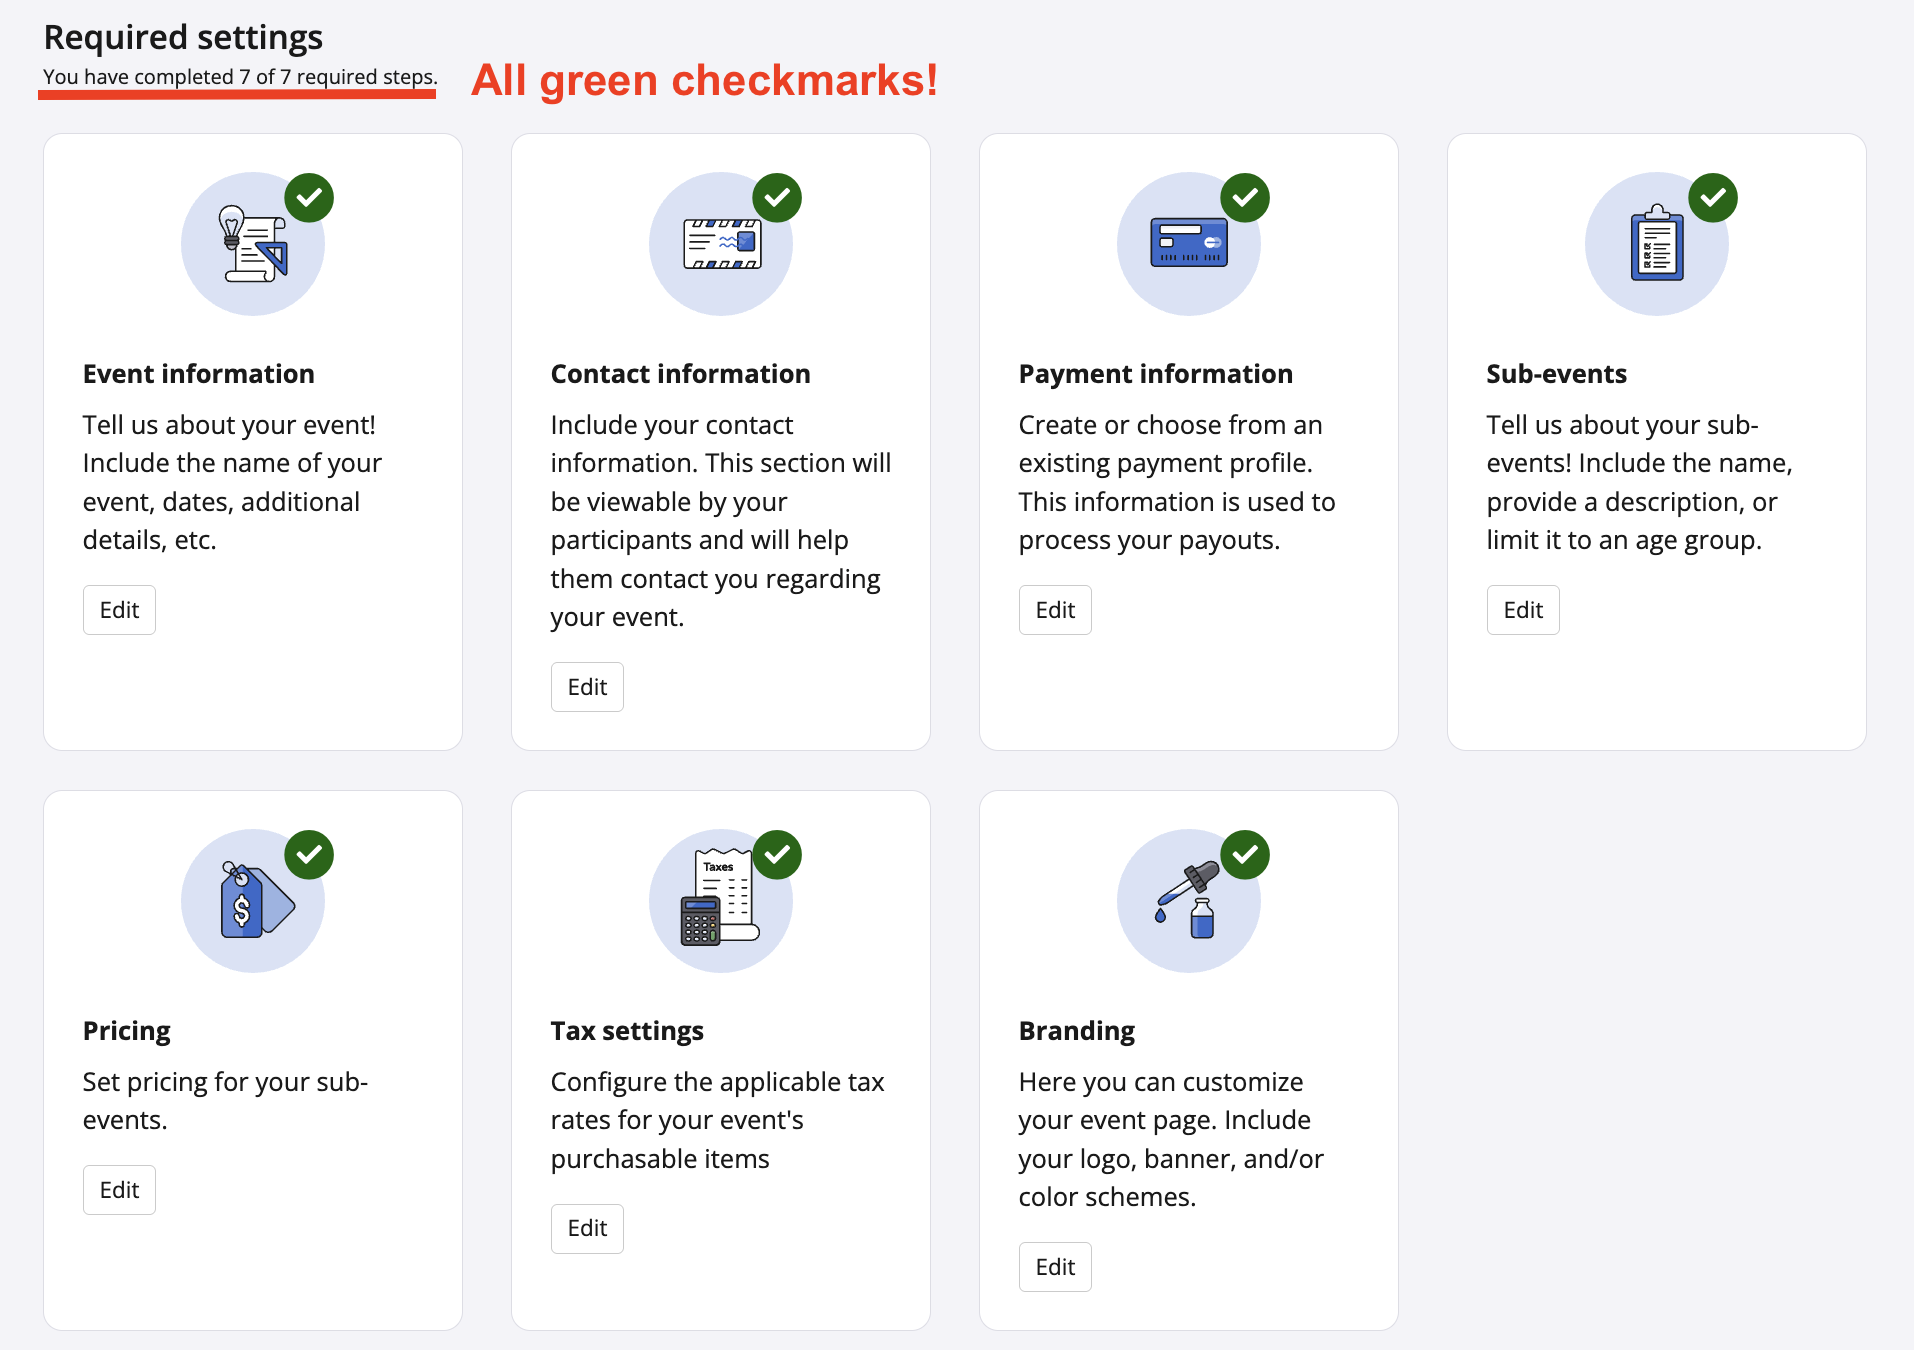
Taking your Race Roster event page live means that the seven required settings are complete and you are ready for registrations.
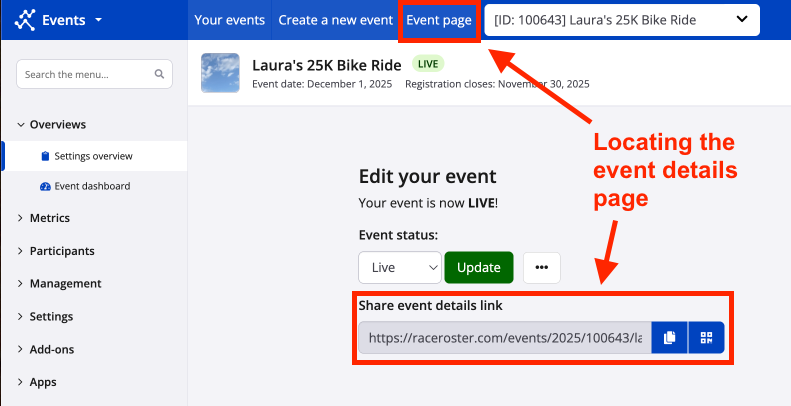
Once live, prospective participants are able to register via the event page URL, found in two locations:
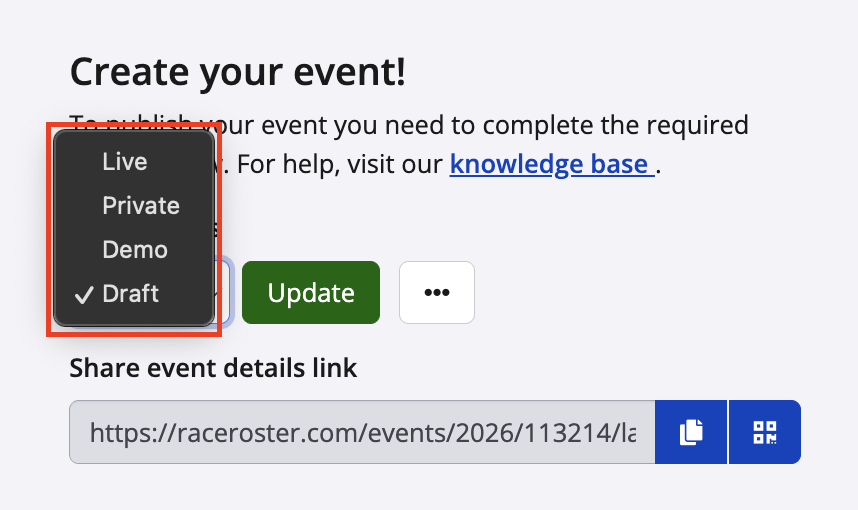
- the settings overview, under "Share event details link" (with a "Copy" icon for the URL and a QR code generator)
- the blue header atop your dashboard, as the "Event page" button
Small edits and changes to the event can be made after the page is live. However, we recommend contacting us if you are unsure about how a setting adjustment will affect current registrants.
Note 1: Before you can take your event page live, you will need to attach it to an owning organization from the event info page. If you have not yet created an organization on Race Roster, you will need to complete that step before proceeding with the instructions below. Check out this helpful resource on creating an organization.
Note 2: Before you can take your event page live, not only does the payment information section have to be complete, but your payment profile must be fully approved as well.
For detailed advice before taking your event page live, read our premium tips article .
The go live process
1. Log in via the welcome page , then click "View dashboard" on the draft or demo event you have been working on.
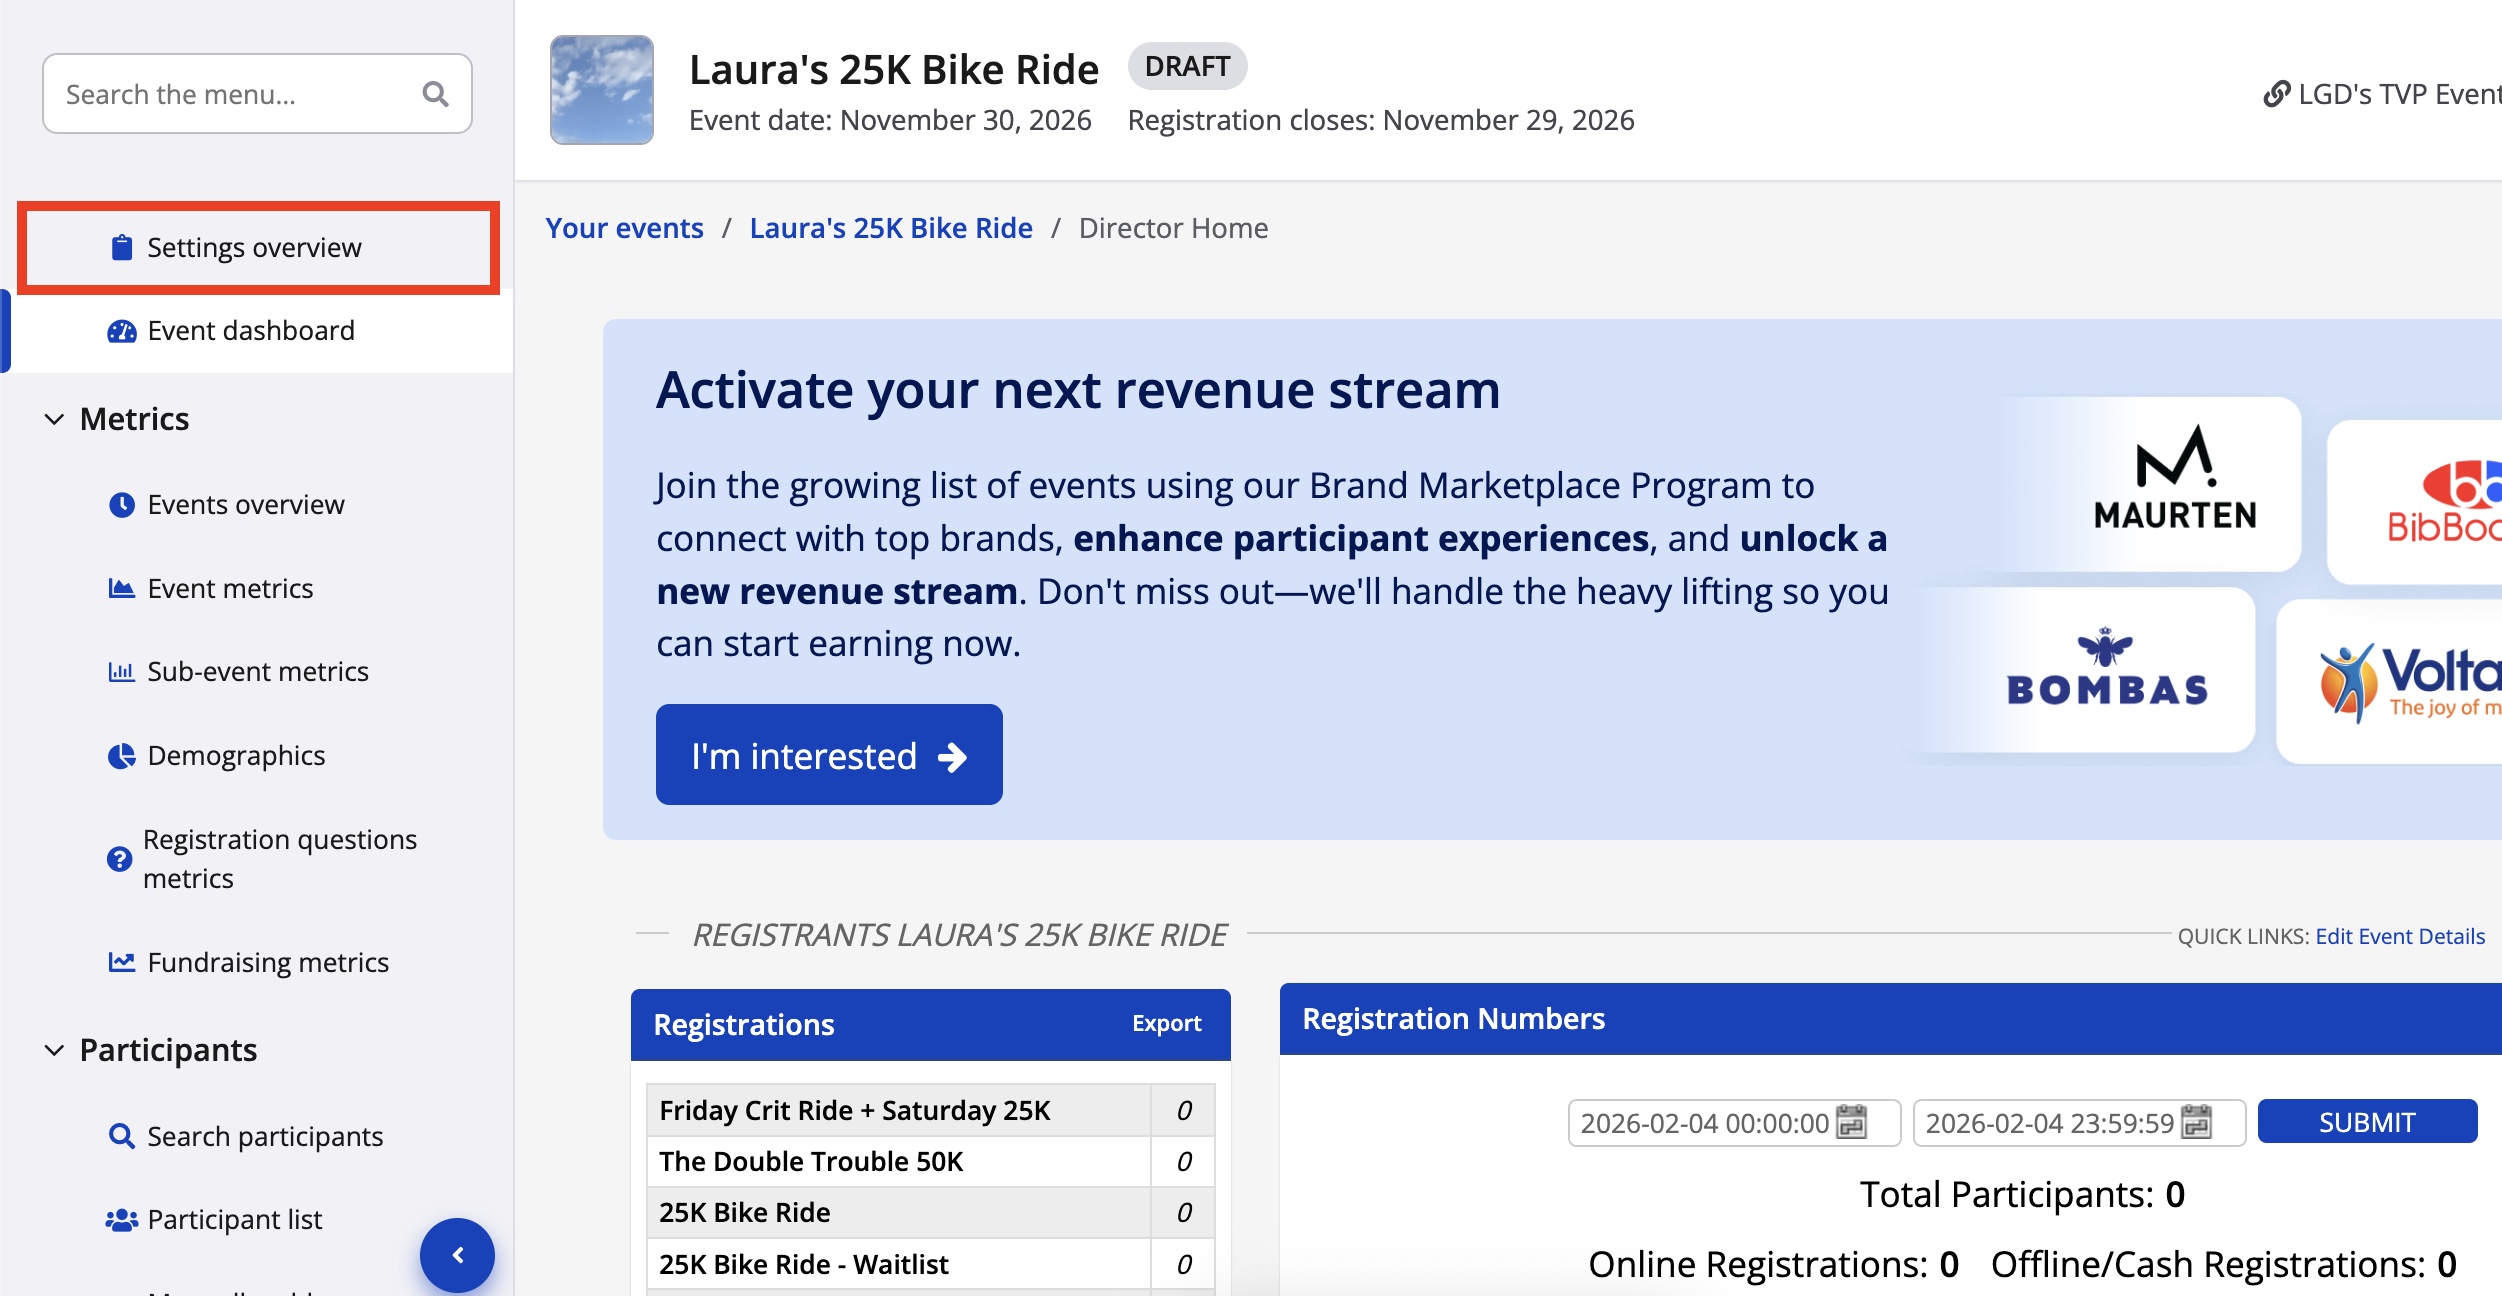
2. Once inside the specific event dashboard, navigate to the lefthand menu and click "Settings overview".
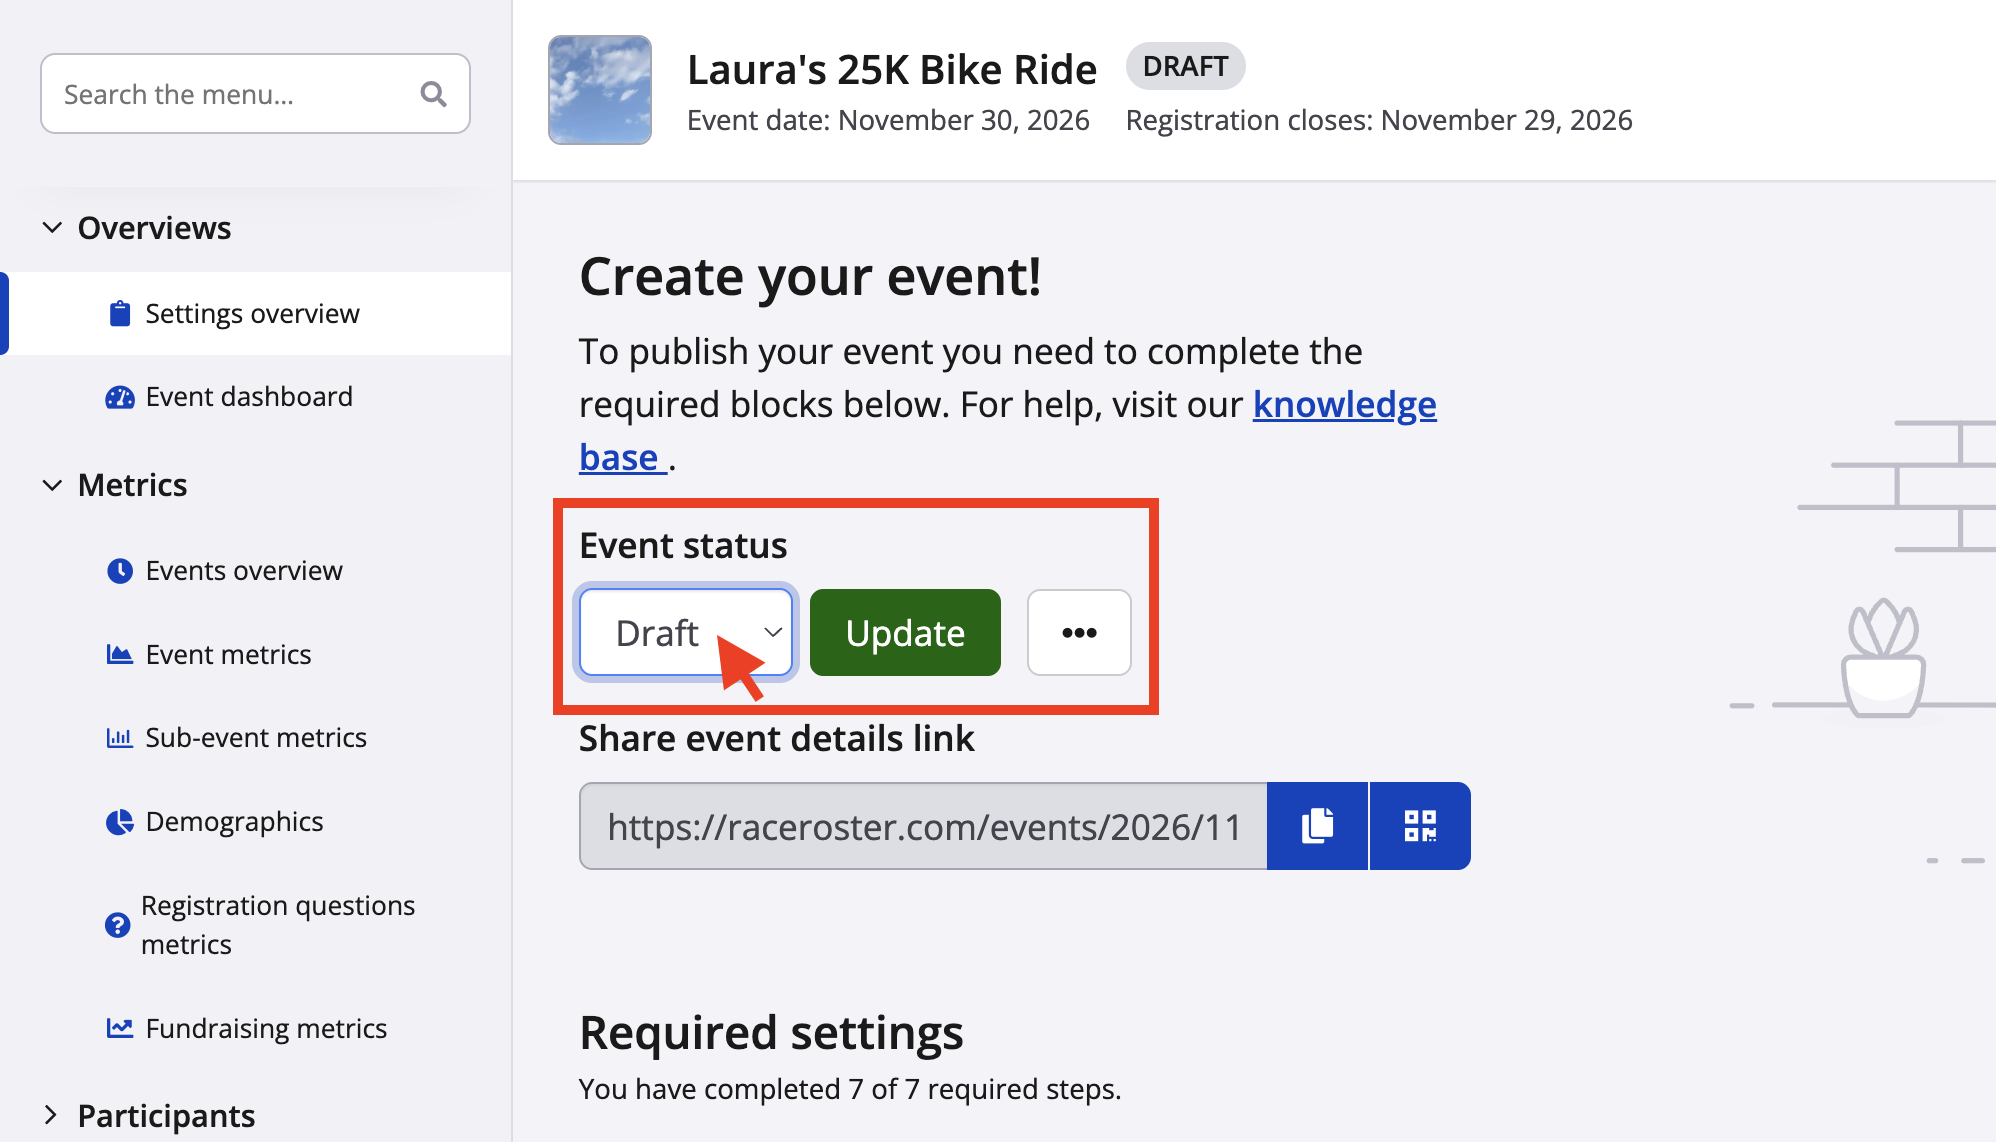
3. From the settings overview page, look to the top. You should see an area titled "Create your event!" with a dropdown menu called "Event status". Use the dropdown menu to select "Live" then click the green "Update" button.
Note: In order to perform this action you must be enabled as a 'Creator' in the event's staff access settings. To update creator access for yourself or other staff, please read our article How do I change or restrict Director permissions .
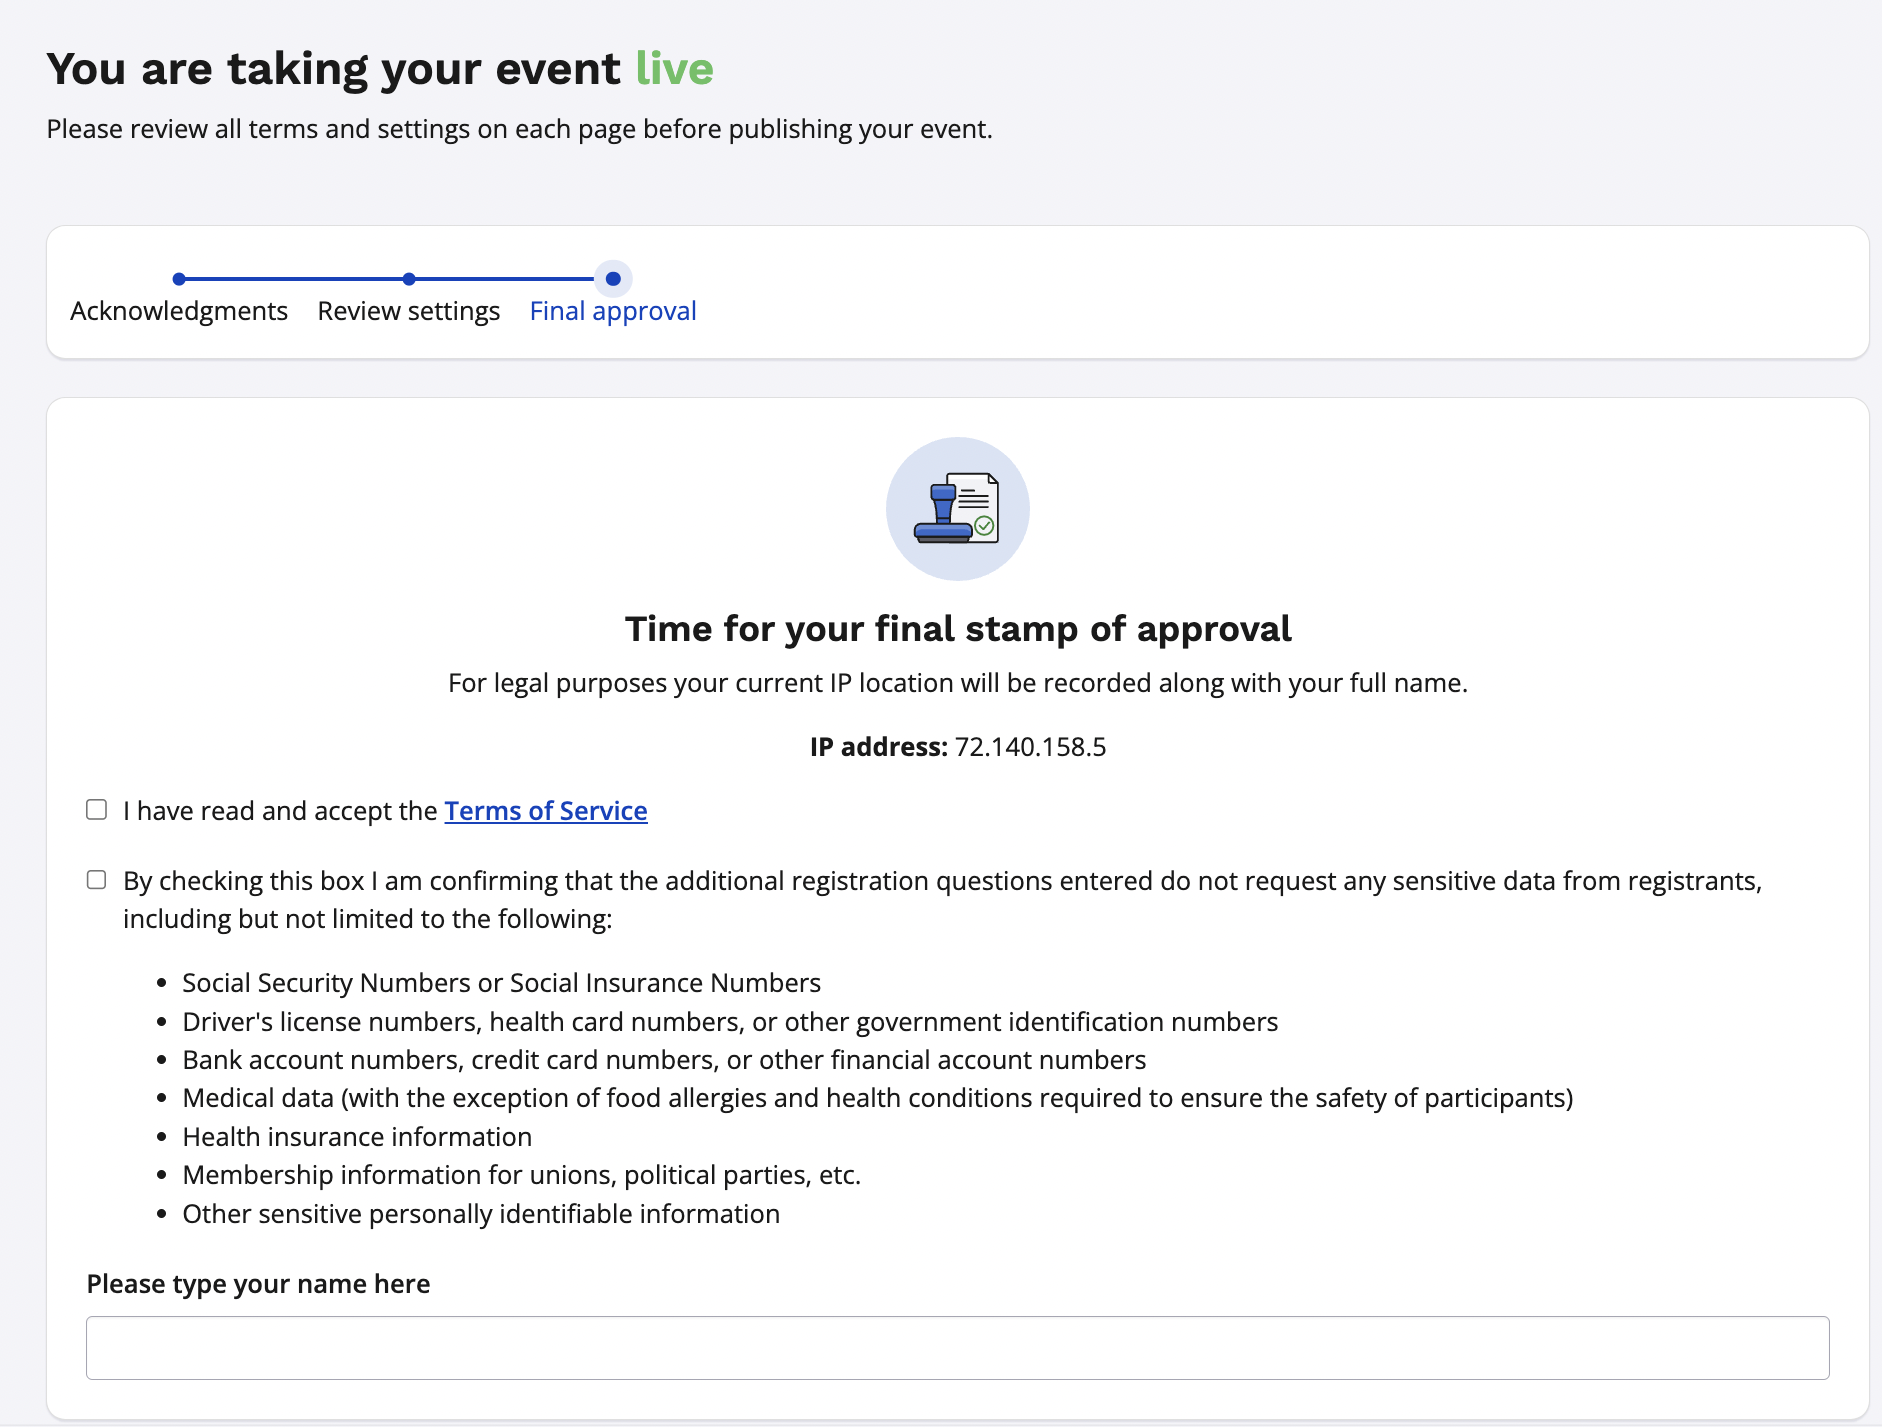
4. When you change the status to Live, a new page called "You are taking your event live" will load. This is the go live process—a set of steps in which you establish final settings for your event, answer some demographic and compliance questions, and review the fee schedule that will apply to event-related transactions.
The first step prompts for you to choose whether or not to enable the Refund Protection Program.
... where you can review your event settings and our terms & conditions associated with using Race Roster. Please read these and contact us by email or phone if questions arise.
5. At the bottom of our terms & conditions, you will be prompted to sign, agree that you have read the terms and conditions and press SUBMIT
Your event is now live.
To test how it looks to registrants hit PAGE at the top of your dashboard. The button should now say REGISTER (or custom language) instead of TEST REGISTRATION
*If not yet done, we recommend walking through registration to test the flow for your participants
For more on finalizing your event visit our section with articles to Create, Edit or Take Your Event Live.