Effective June 2025, we expanded where Stripe Connect payment profiles may apply. In previous years, only fundraising organizations collecting in USD were allowed (and, in most cases, required) to associate a Stripe Connect payment profile in order to receive payouts from Race Roster. Now, a wider array of clients, operating in different currencies, are allowed to set up their payment profiles this way. These types of payment profiles can now also be imported to your Race Roster CRM organization.
Effective November 2025, Stripe Connect becomes the only method for new payment profiles associated with events and fundraising organizations collecting in USD and CAD. Furthermore, an approved payment profile is now required before taking an event Live.
Read below to learn more about Stripe Connect and the setup procedure.
What are the key benefits of Stripe Connect?
Stripe is Race Roster’s trusted payment partner, processing almost every financial transaction in our system (registrations, donations, refunds, etc). In order for you to receive event payouts (revenue from registrations, products, gift codes and other fees) and fundraising payouts (revenue from donations), you must create and associate an organization payment profile to your event and/or fundraising organization. If you are an event organizer or fundraising coordinator operating out of the United States, Canada, Australia or New Zealand, here are some compelling reasons to create that payment profile with Stripe Connect today:
- Streamlined payouts: Stripe Connect automates the payout process, meaning that funds are automatically routed to the user's connected account.
- Assured compliance: Stripe handles much of the "Know Your Customer" (KYC) verification and identity requirements, staying current on global payment regulations. Stripe ensures compliance on all fronts, from the start.
- Peace of mind: Stripe's advanced built-in fraud detection tools help protect your organization, participants and donors from fraudulent activities.
- The way of the future: Effective early 2026, all Race Roster organization payment profiles in USD, CAD, AUD and NZD will require Stripe Connect.
How to create a Stripe Connect payment profile
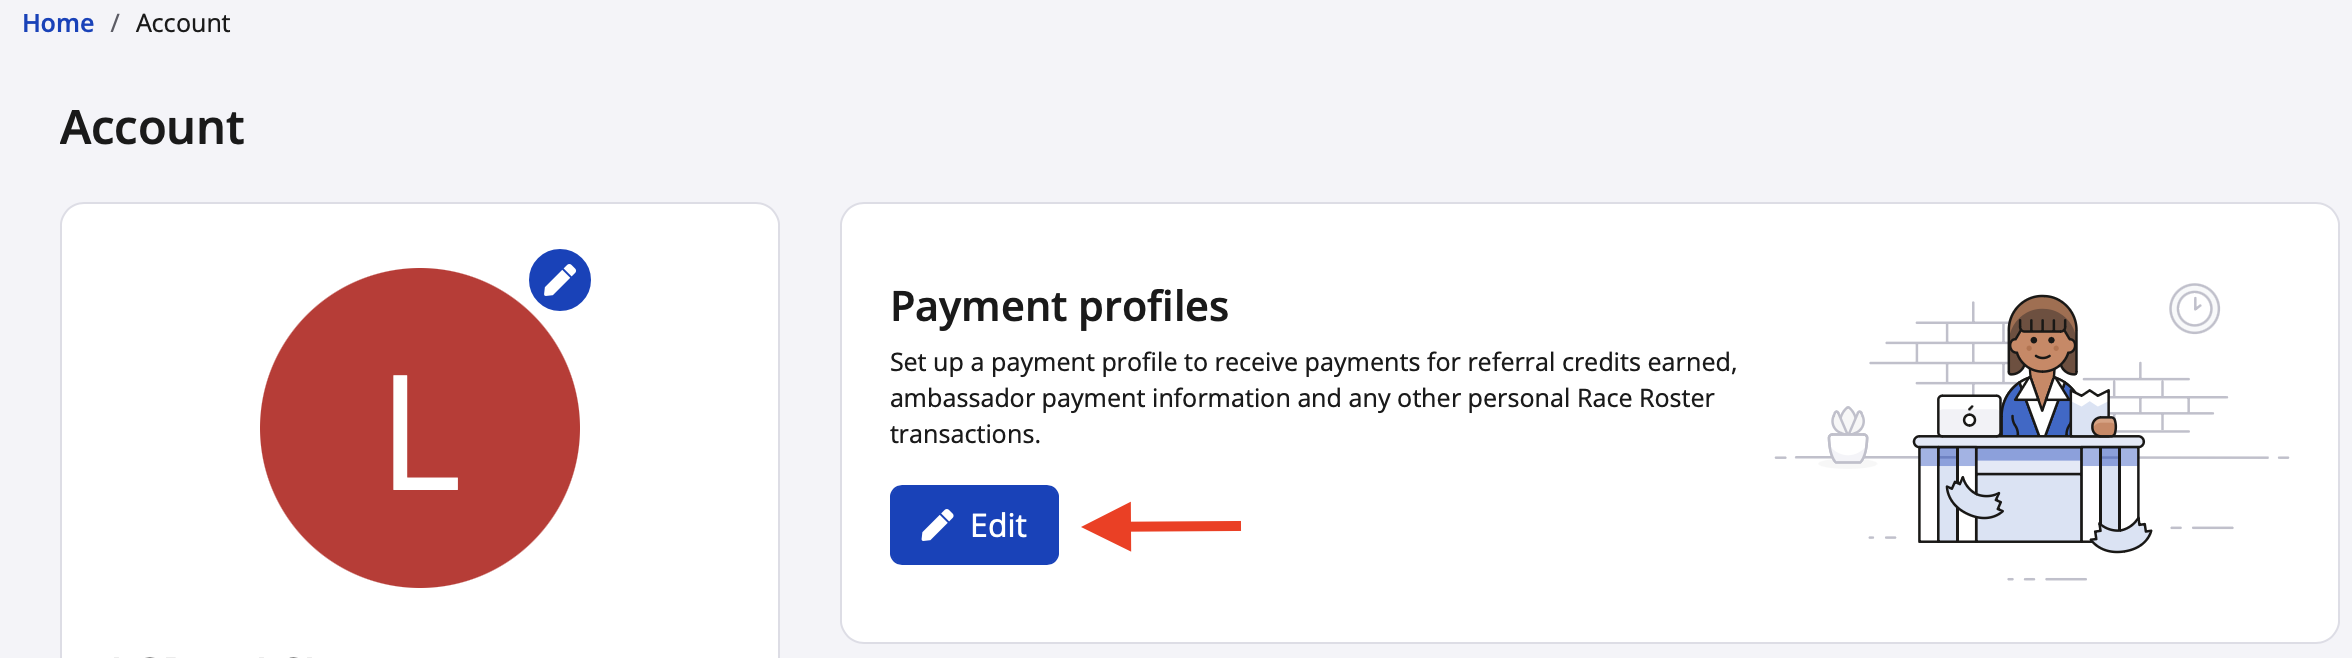
1. Navigate to your account settings and click the blue "Edit" button in the payment profiles section. Screenshot follows.
2. In the organization profiles section, click on the green "Add new payment profile" button and select the applicable Race Roster CRM organization from the dropdown. Screenshot follows.
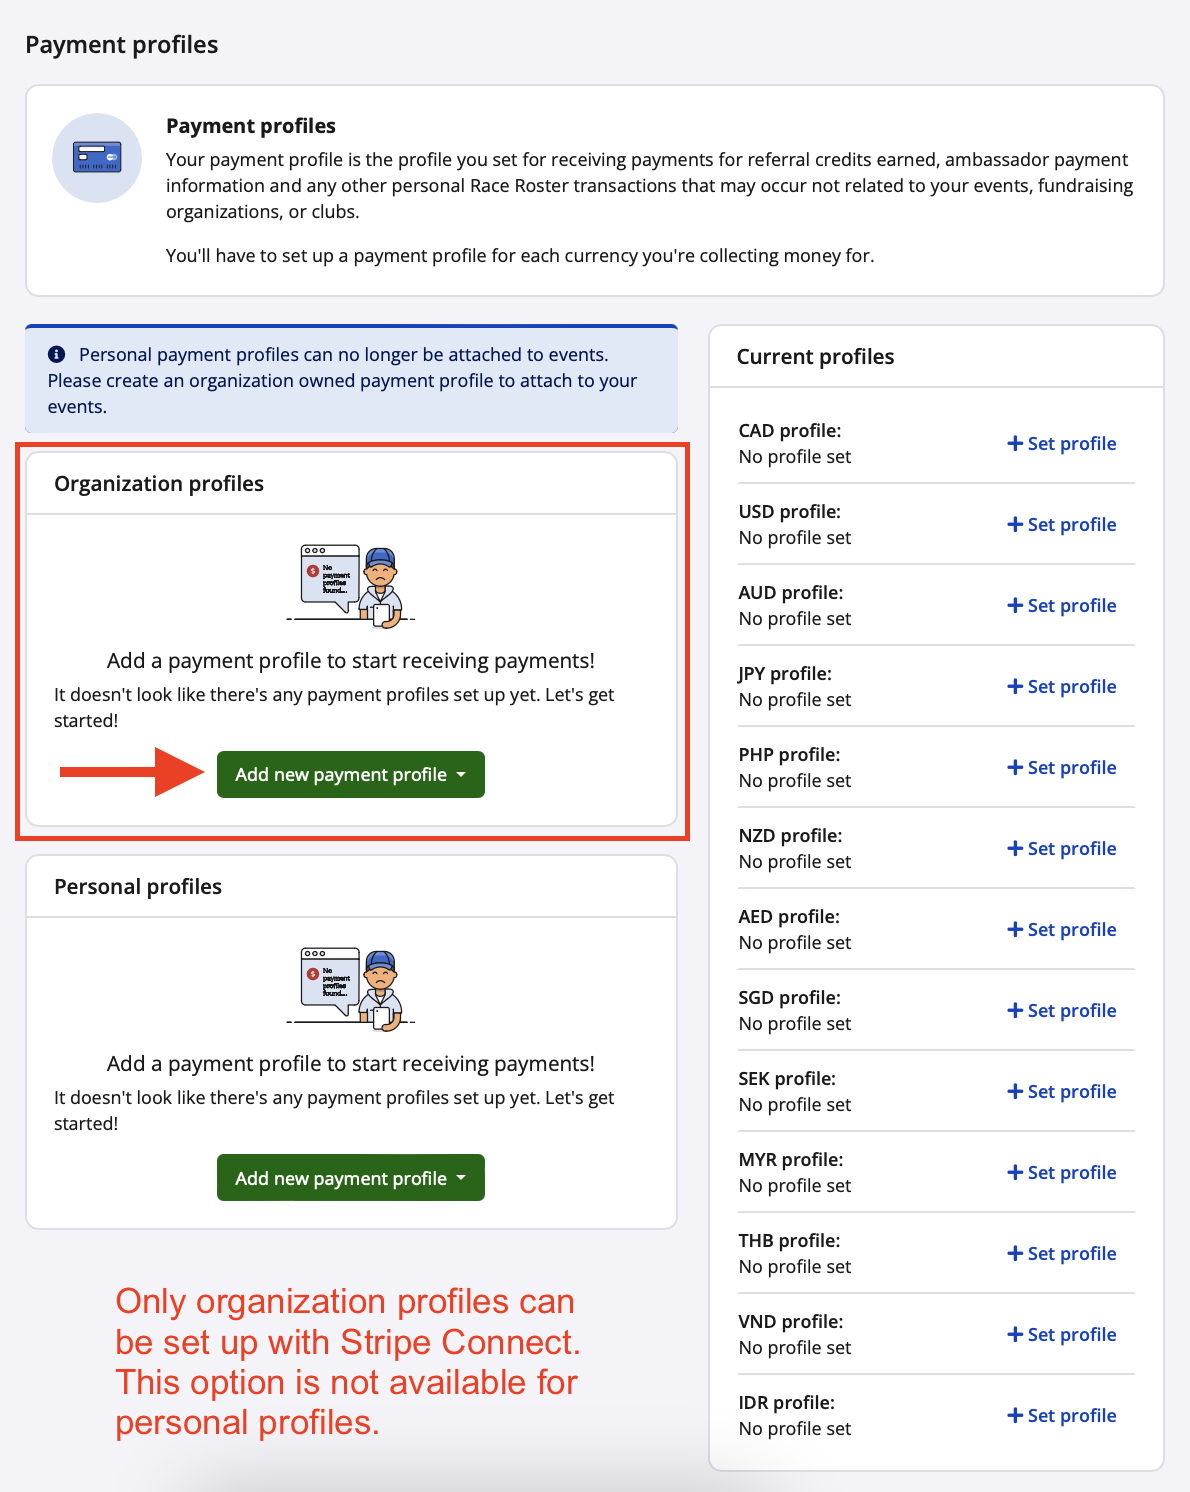
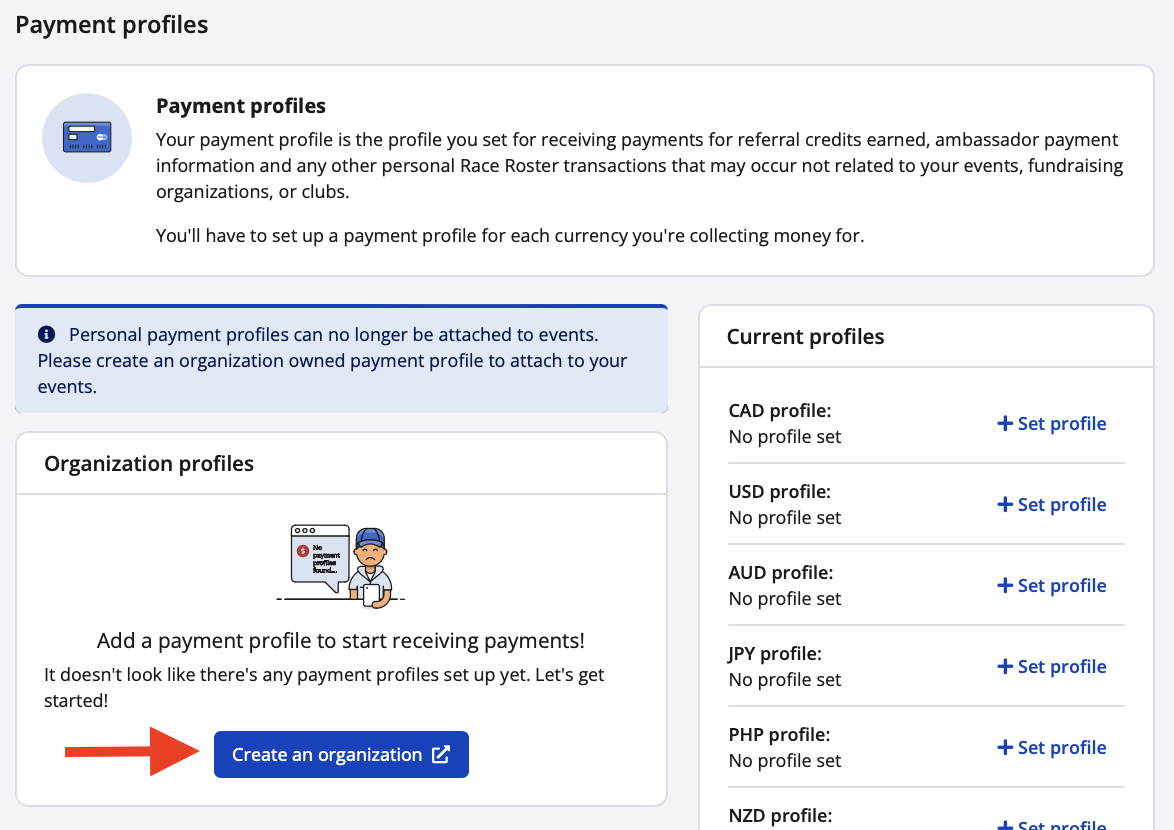
If you do not yet have an organization, you will instead see the blue "Create an organization" button and must follow the instructions in our other article, How to create an organization on Race Roster , before proceeding. Screenshot follows.
Please note:
- Another user may have already created the organization you are looking for. Talk to your fellow event organizers to ensure you are granted access.
- For authorized currencies, the CRM organization that you select will dictate the currency of the Stripe Connect payment profile.
- Personal profiles (used for referral payouts) don't currently support Stripe Connect.
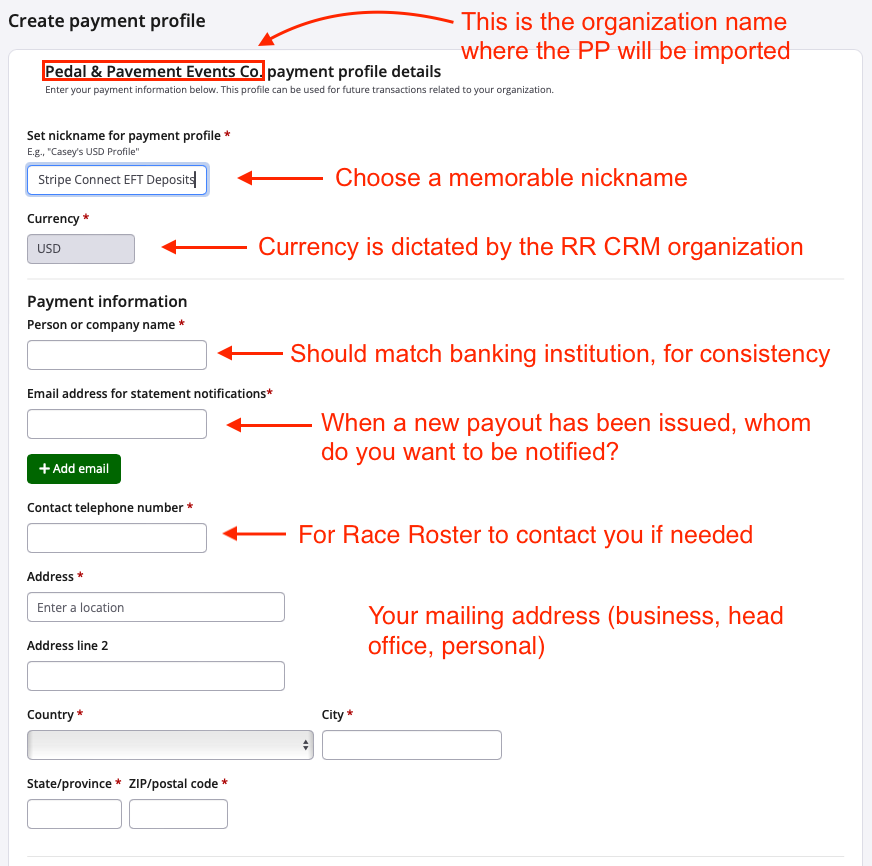
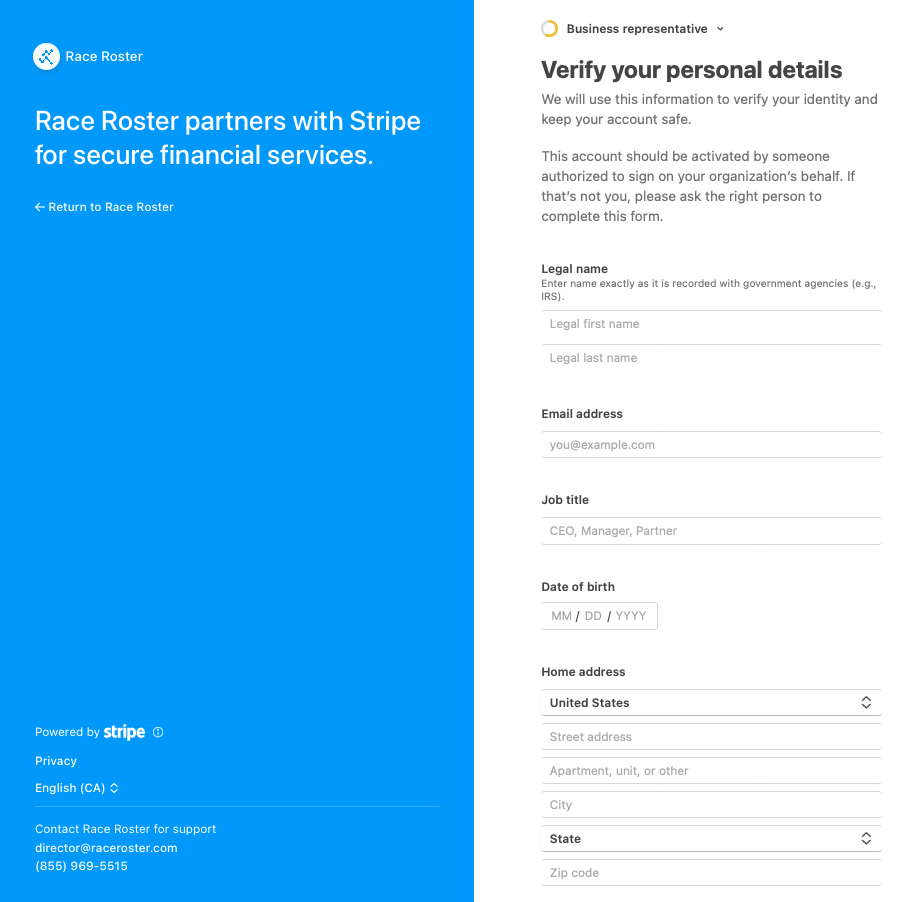
3. From the create payment profile page, fill out the fields accordingly:
- Set nickname for payment profile: Choose a memorable nickname that can help you distinguish this Stripe Connect payment profile (PP) from other PPs in your user account or organization. For example, if your organization is called "Pedal & Pavement Events Co." you could call this the "P&P Stripe Connect EFT Deposits" and thereby distinguish it from any cheque and standard direct deposit payment profiles that were previously imported to your organization.
- Person or company name: Indicate to whom the payouts/deposits are due. We recommend matching this with the name that you've registered in your banking institution.
- Email address for statement notifications: Indicate the email address(es) that should receive any new payout statement notifications, across events and fundraising organizations. In other words, for any and all events (EIDs) and fundraising organizations (CIDs) that associate with this payment profile, whom do you want to be notified of a new payout being issued?
- Contact telephone number: Indicate the phone number for Race Roster to call if we ever have a payment, compliance or verification question.
- Address fields: Your business or organization's mailing address.
Screenshot follows displaying the upper portion of this page.
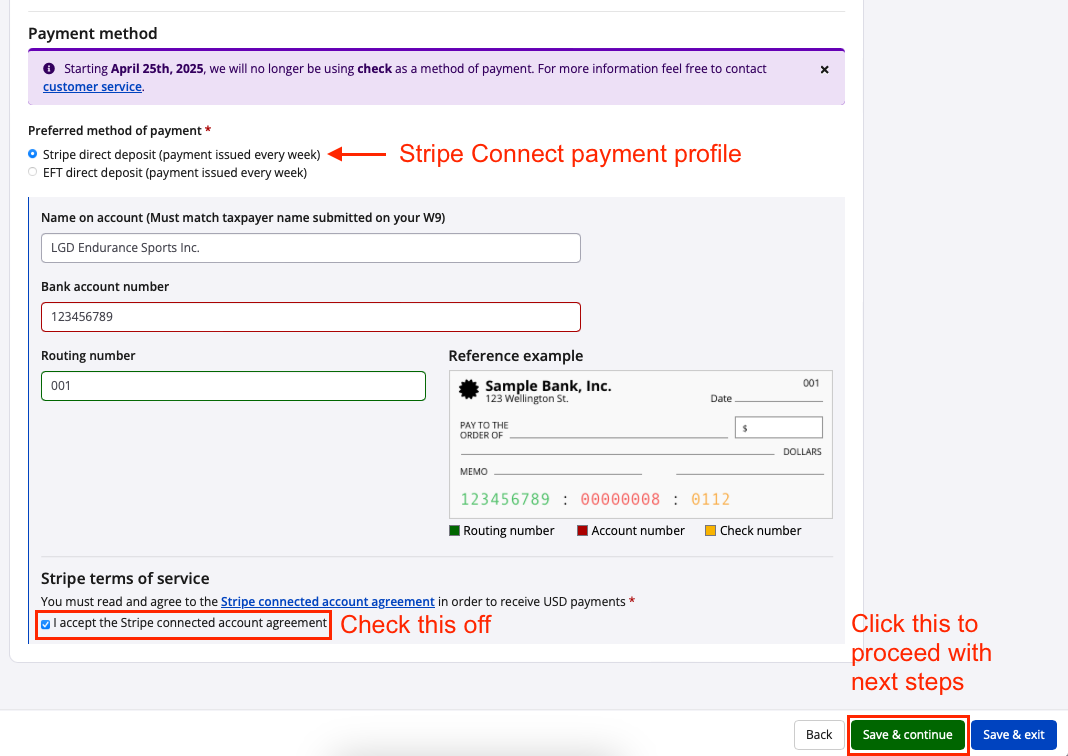
- Preferred method of payment: Select "Stripe direct deposit (payment issued every week)".
- Banking information: Fill out the various fields corresponding to the bank account where you wish to receive the deposits (name on the account, account number, routing number, etc). Fields vary by region and currency.
Finally, click the green "Save & continue" button to be redirected to Stripe. Screenshot follows to display the lower portion of the page.
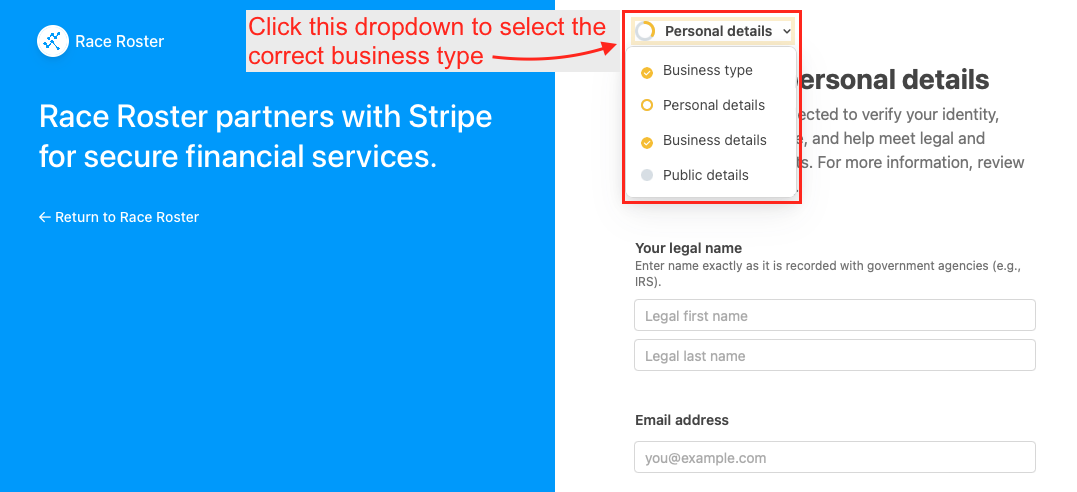
4. On the Stripe Connect profile page, you will see various fields prompting for entry. Before proceeding, use the dropdown menu at the top to select "Business type". Screenshot follows.
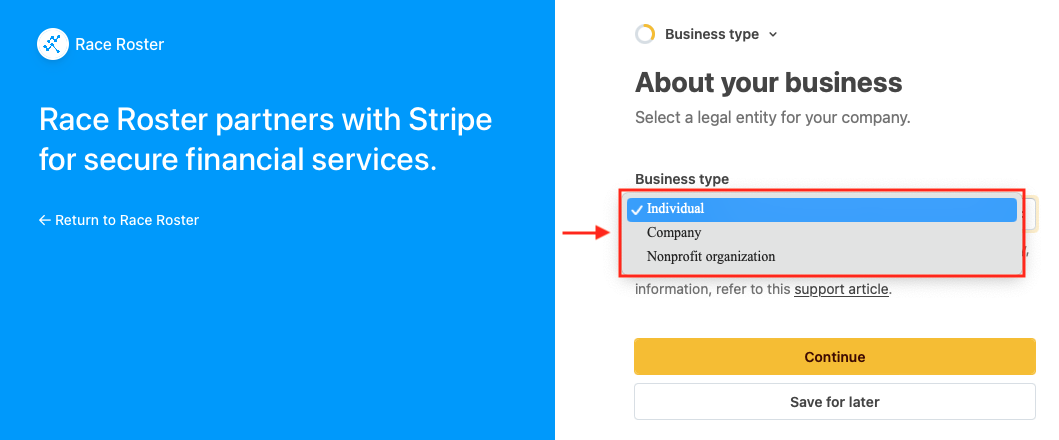
5. On the new page, use the "Business type" dropdown menu to select accordingly. New fields may appear for further categorization. Once you are satisfied, click the yellow "Continue" button. Screenshot follows.
6. On the next few pages, you will be prompted to enter information according to previous selections. If you have difficulty filling out certain fields (e.g., legal names, business/nonprofit registration numbers, etc) we recommend getting in touch with the treasurer, accountant, board or executive team at your organization. Stripe also provides a support centre which may be useful. Screenshot follows with an example of such a page.
Bear in mind that you may instead click the white "Save for later" button to continue your progress after you have collected the information. You may save the URL to the Stripe Connect page, or re-enter it from your Race Roster account's payment profiles page (Step 1 above).
7. You will eventually arrive at a page titled "Review and confirm", summarizing the information you have entered. If any sections haven't been verified or completed, a small pink label will appear. The "Edit" hyperlinks can be used to return to a section. Screenshot follows.
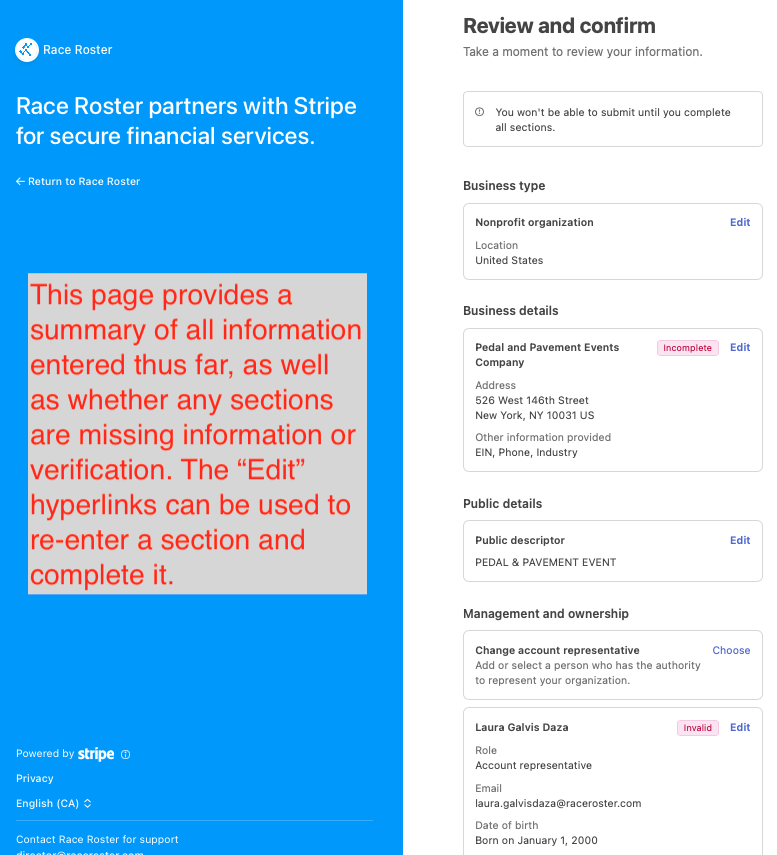
Once all information fields are complete, click the yellow "Confirm" button at the bottom to submit all information. You will be automatically directed back to Race Roster.
8. Back on the Race Roster payment profiles page, our system will indicate whether any additional forms are needed. You will see that the Stripe Connect payment profile is now marked as status "Pending" with a yellow label when you've completed your part in the process.
Note: If ever you see "Stripe pending", you must re-enter the Stripe profile for completion.
It will take Race Roster and Stripe 1 to 5 business days to review the information and documents that you have provided.
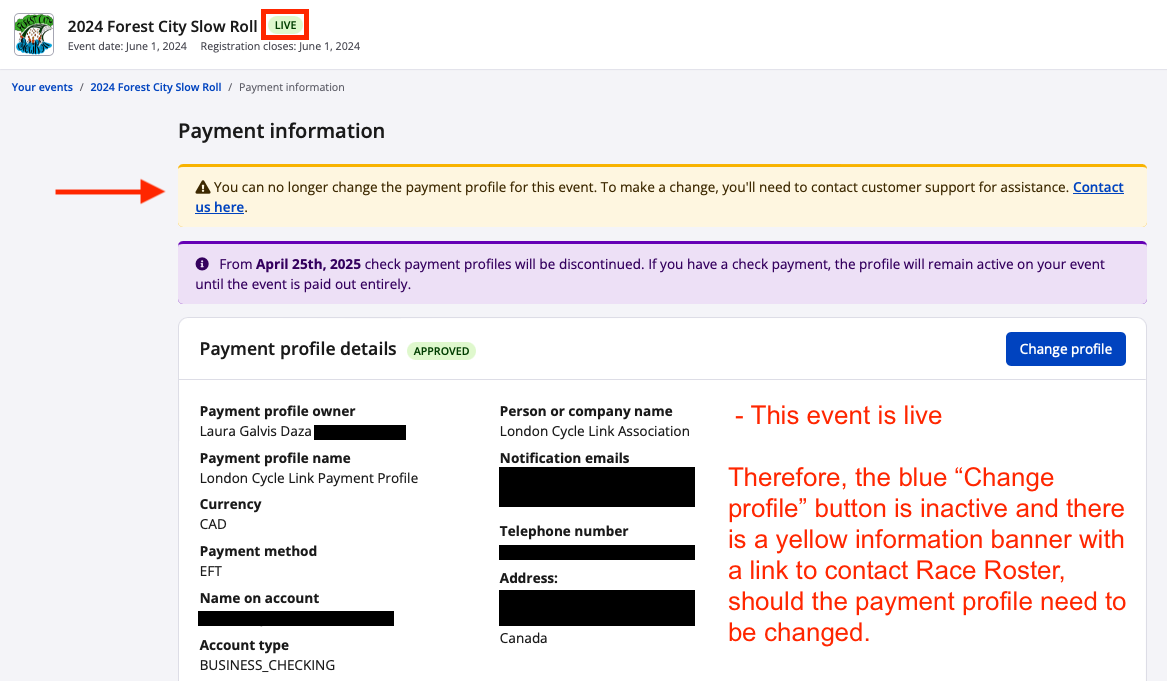
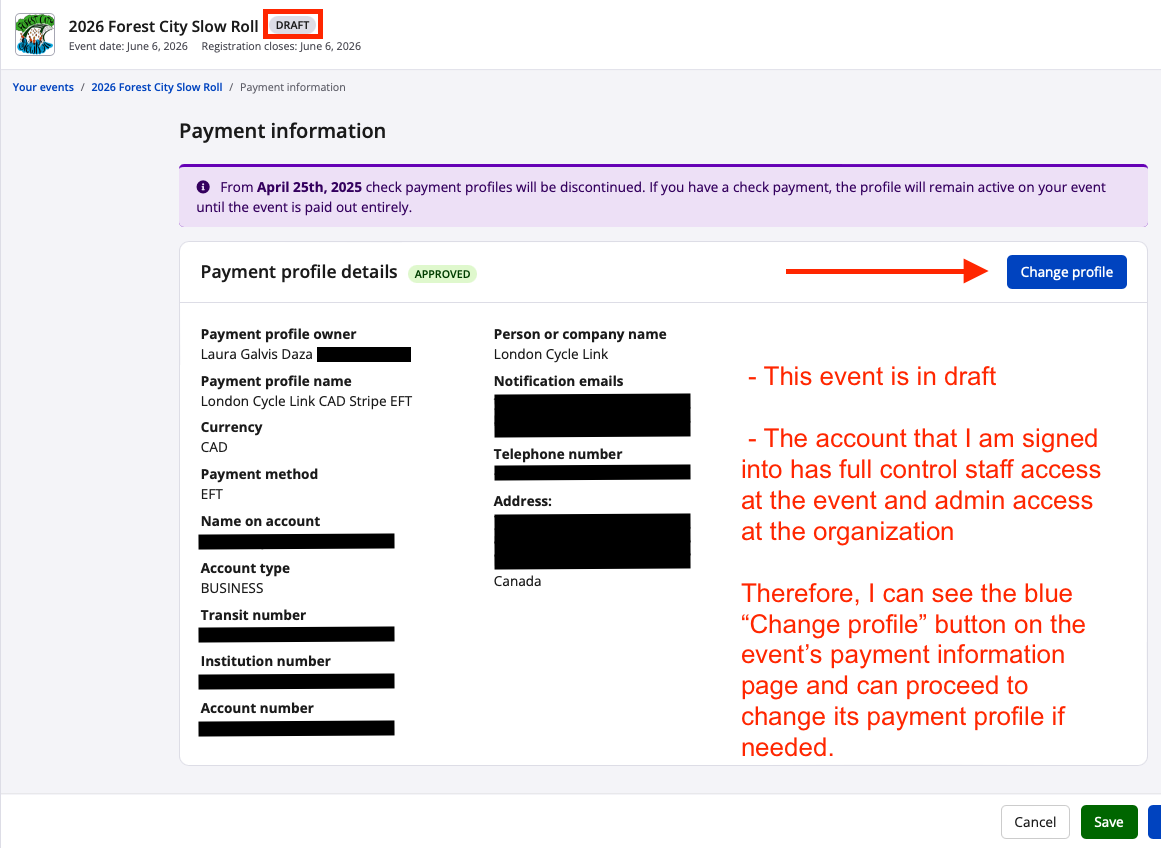
Note: Effective August 2025, the event status determines your ability to change payment profiles.
- If an event is in status "Draft" or "Demo", you may change the associated payment profile on the payment information page at any time as long as you have the correct type of access.
- If an event is in status "Live" or "Private", you must click the hyperlink in the yellow banner at the top of the payment information page. It will prompt you to fill out our contact form, and we'll be in touch to assist you.