What are validation lists?
Our feature validation lists functions as a building block that, once set up, can be leveraged by other features within the Race Roster CRM and event dashboards. The basic idea is that you can upload a list of people, and later use that list in another feature to validate if a new registrant, existing participant, or contact is eligible to proceed with a specific action—all based on whether or not the person appears on the list.
How are validation lists used?
Currently there are three features in Race Roster that leverage validation lists:
- Sub-events: A sub-event is a category of registration. From a sub-event's settings, you may enable validation so that only individuals appearing on a validation list may register for the sub-event (in other words: not on the list? can't register in this sub-event). For more information, please read our article How to create a sub-event .
- General discounts: A general discount will reduce or change the current price of one or more sub-events for one or more registrants in a transaction. From an event dashboard, you can create a general discount and adjust its settings in such a way that a person must exist on a particular validation list before they can be granted the discount (in other words: not on the list? not eligible for the discount). For more information, please read our article How do I set up general discounts for my event?
- Start groups: From an event dashboard, you can create a start group and adjust its settings in such a way that a person must exist on a particular validation list before they can be assigned to that start group (in other words: not on the list? can't join the start group). For more information, please read our article How to set up and manage start groups for my event participants .
Below, you will find detailed information about the validation lists feature, including the procedures for setup, creation, deletion, editing & re-uploading, managing records, and troubleshooting.
Basic setup for validation lists
Where to find the feature
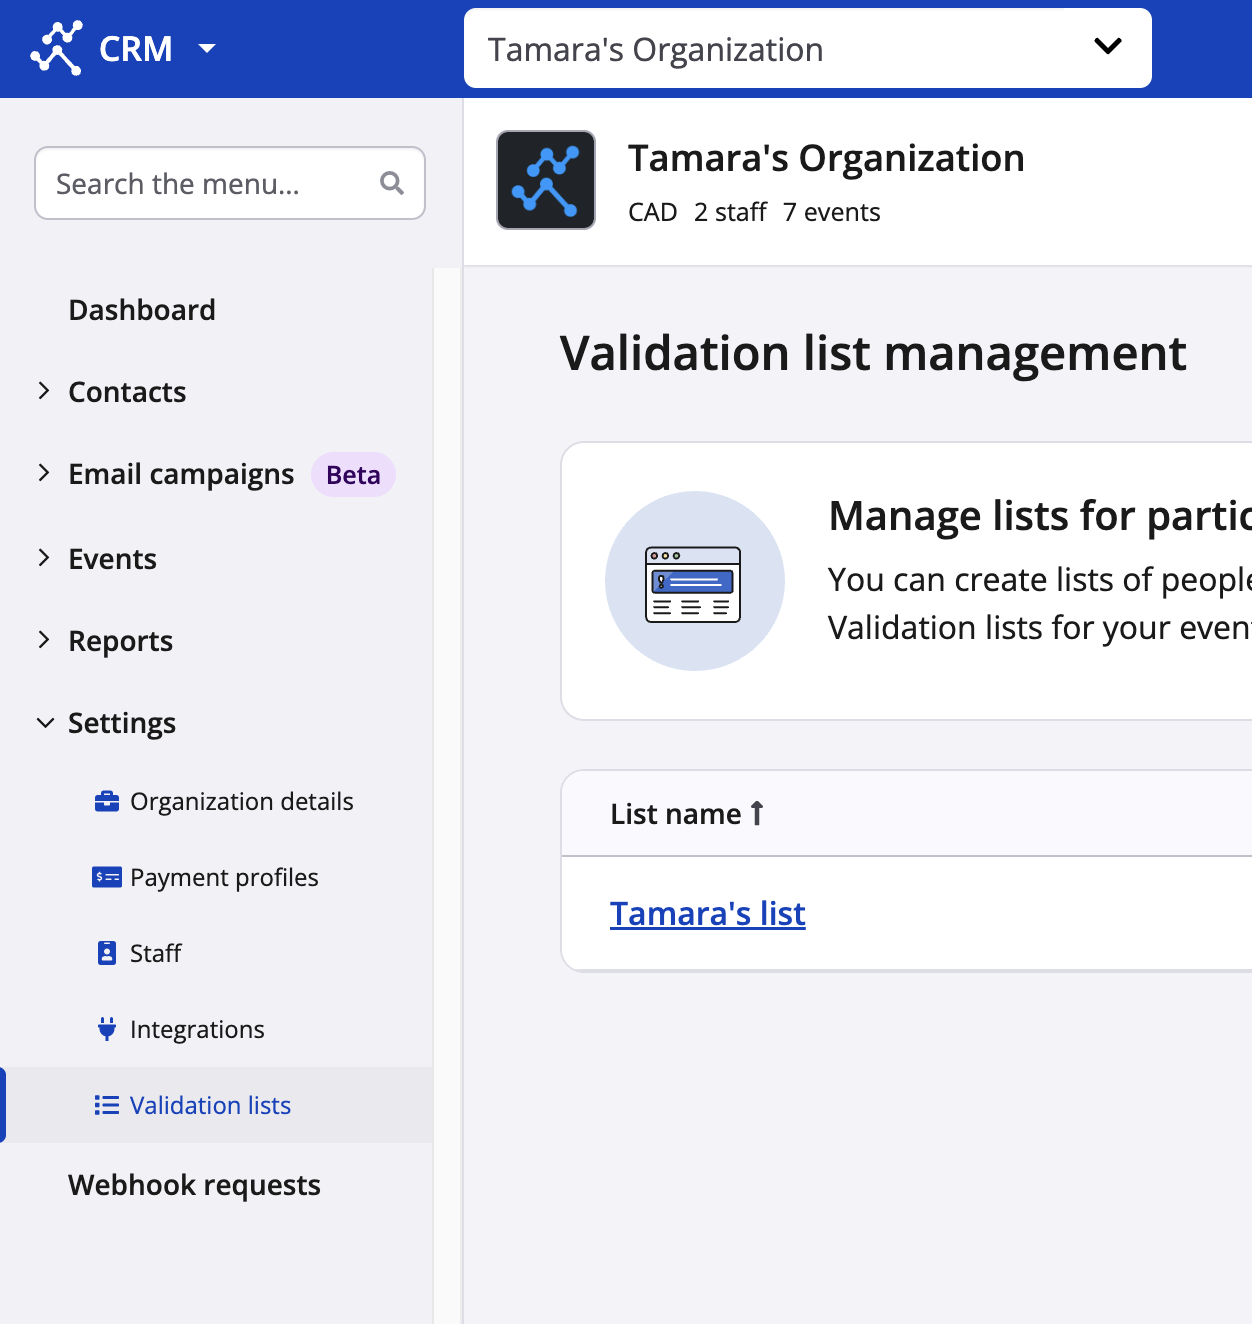
Validation lists are found with your organization in Race Roster CRM, under “Settings”.
1. Navigate to your organization dashboard
crm.raceroster.com/organization/[org_id]
2. Go to "Settings"
3. Click on "Validation lists" to land on the validation list management page
How to create a validation list
1. Click on the green "Add list" button
2. Give your list a name
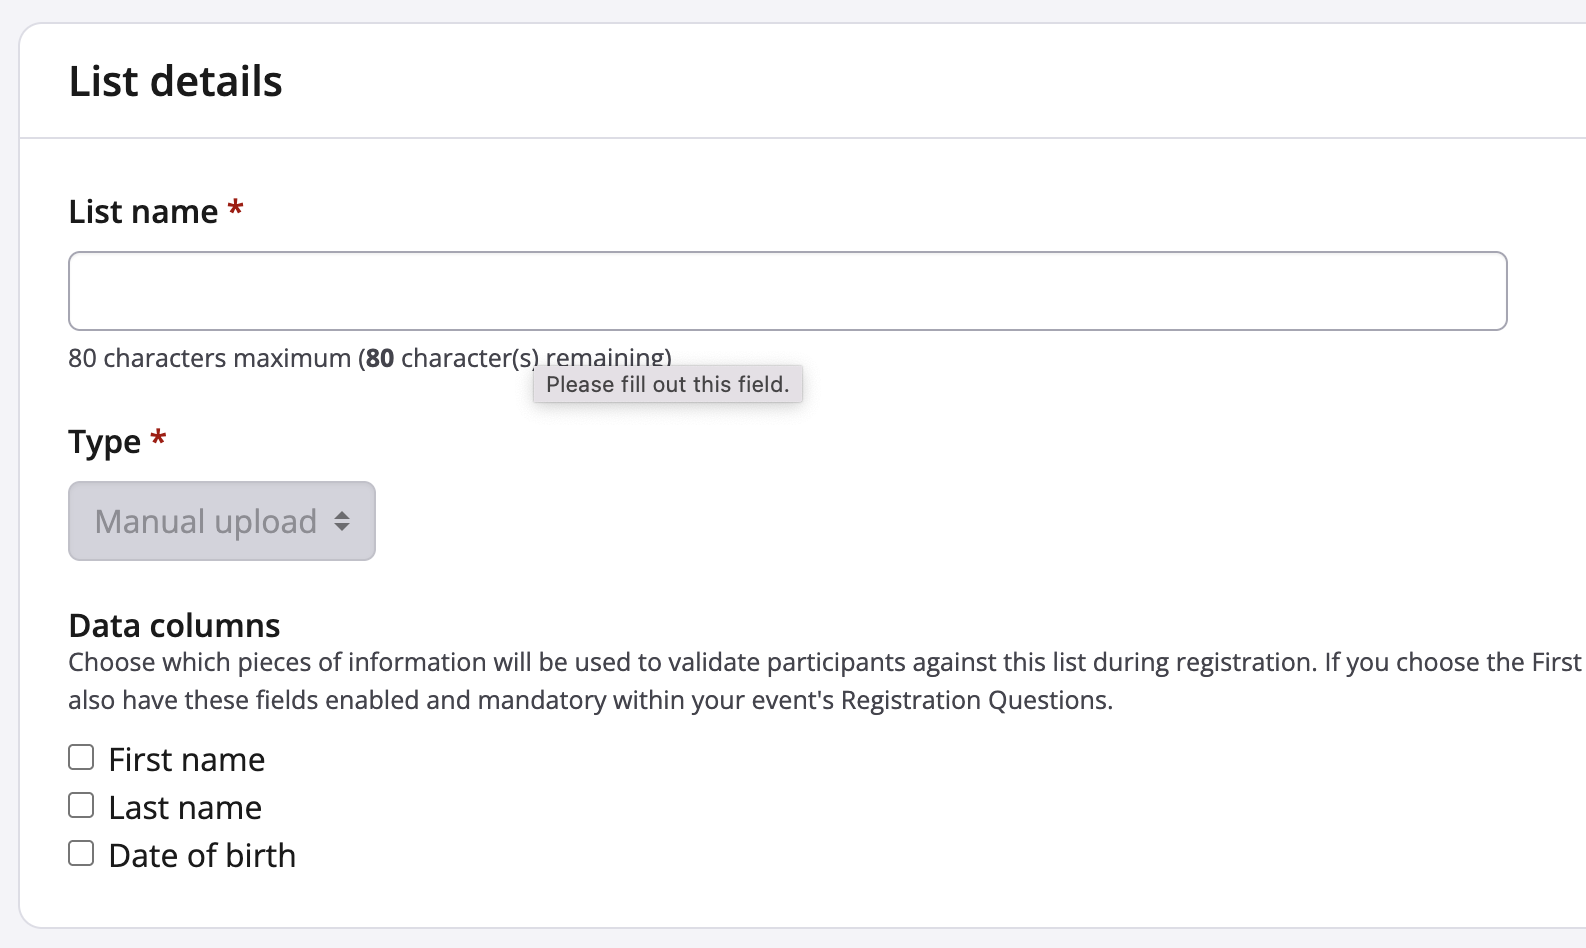
3. Set a type
a. Currently there is only one type available, which is "Manual upload"
4. Choose which data columns this list will contain
a. Each selected data column will be used when determining a match during the validation process
b. For example, if a list has Last Name and Date of Birth enabled, the system will check the combination of the last name and date of birth entered by the registrant against all records in the list; if only the last name OR date of birth match, this would not be recorded as a positive match
5. Choose the CSV file you would like to upload
6. Click the blue “Next: Column Mapping” button
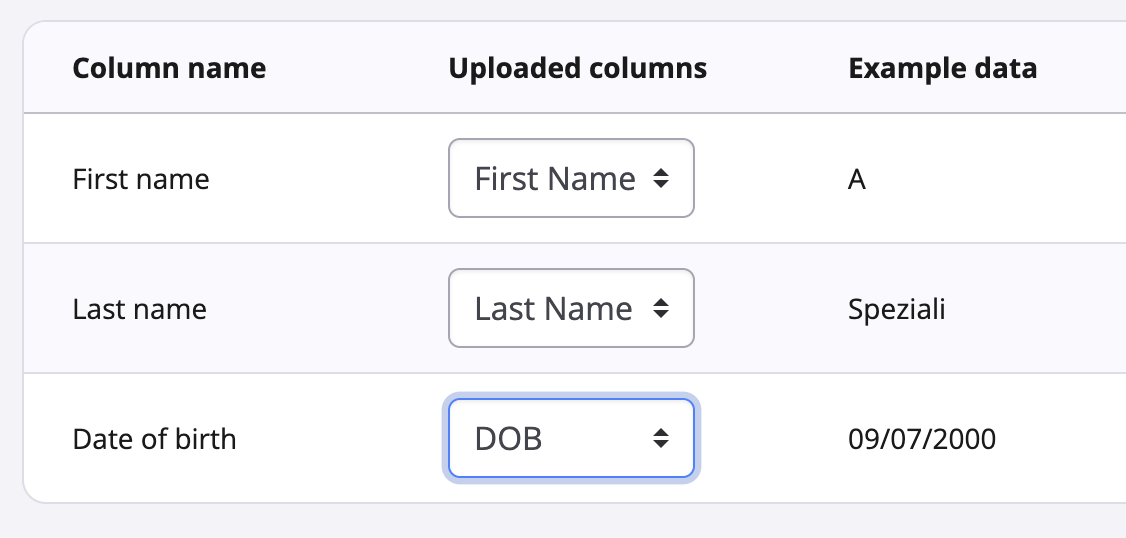
7. On the next page, map your selected data columns with the columns within your CSV file
a. Column names available reflect the data columns selected in step 4
b. Uploaded columns are the columns contained within the CSV file
c. When you map a field, an example from the file will be pulled for the user to check and confirm they mapped the correct column
8. Click the green “Finish Upload” button
9. The list will be added to the validation list management page with the current import status
a. Most lists will complete the upload process within a few seconds, however very large lists may take a few minutes to complete
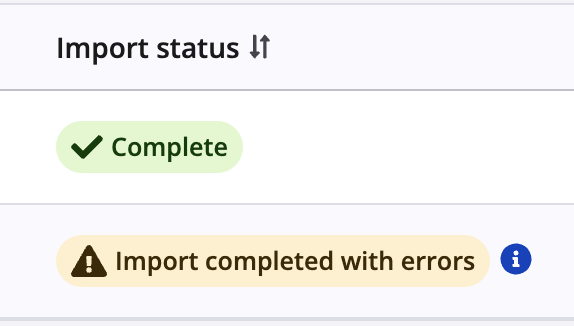
b. Statuses:
i. Complete (green): Imported successfully, no missing fields
ii. Import completed with errors (yellow): Imported successfully, but some fields have missing data
iii. Failed to complete (red): Was unable to import successfully
Editing or deleting a validation list
There are several ways to edit a list:
- Editing the list settings
- Editing the records within a list (discussed further down the page)
- Re-uploading a list
How to edit the validation list settings
Currently the only edit you can make to the list settings is the list name. If you would like to edit which columns your list uses, you will need to re-upload the list.
To update the name of the list, using the edit list settings page:
1. To edit a list navigate to the validation list management page
2. Click on the “...” action button for the list you would like to edit
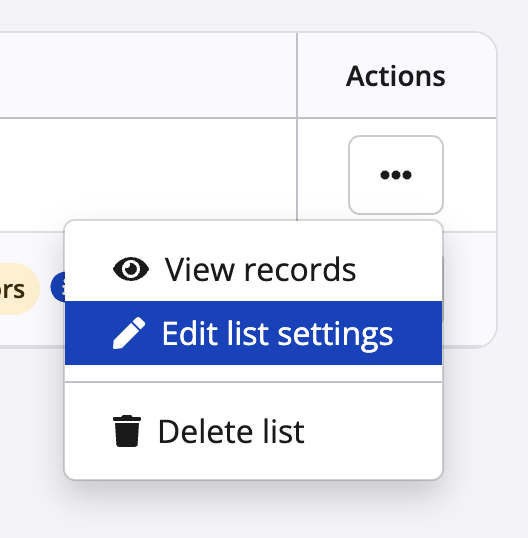
3. Choose the “Edit list settings” option
4. Edit the name of the list
5. Click the green "Save" button
How to re-upload a validation list
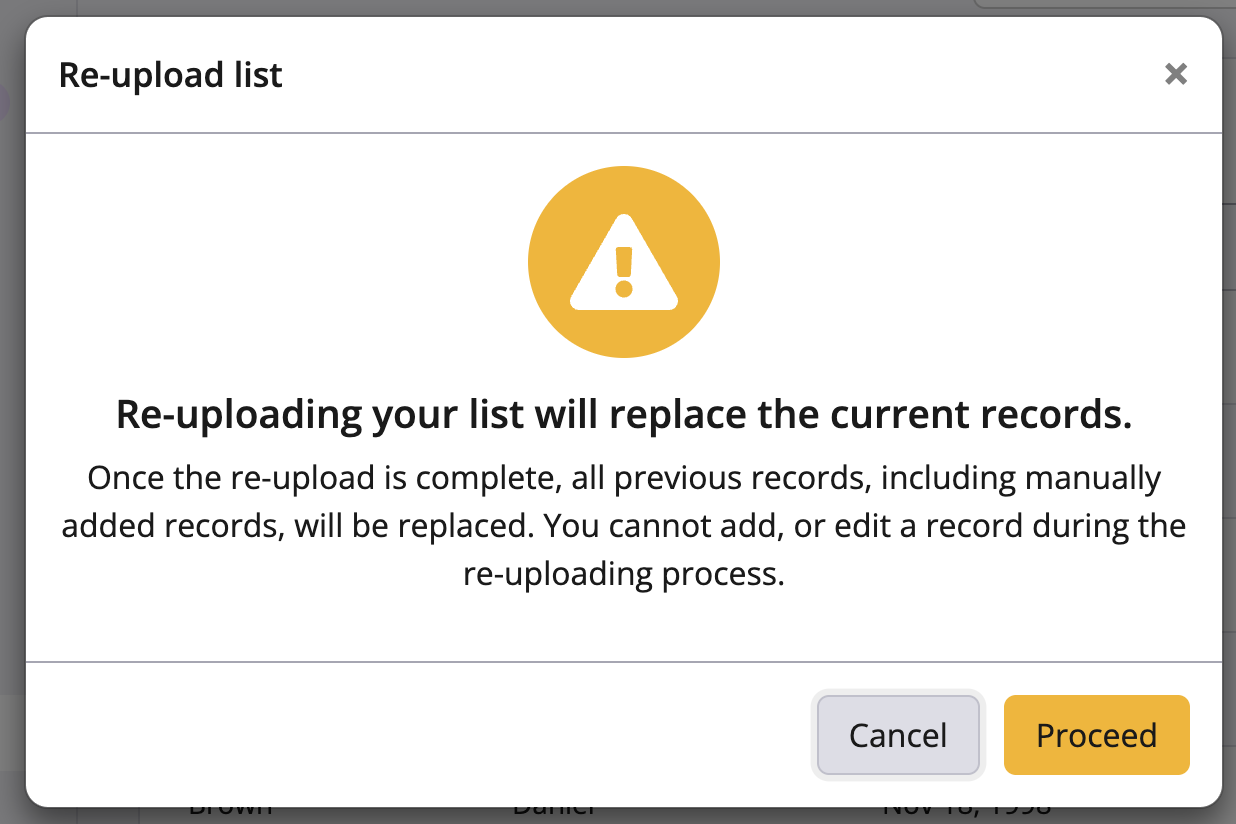
Re-uploading a list allows you to bulk update records within a list or update which columns the list uses. This re-upload process follows much of the original upload process. Re-uploaded lists will not replace the current list until the import is fully complete. This means if you have any lists currently in use within registration, no downtime will occur during the import process.
1. Navigate to the validation list management page
2. Click on the “...” action button for the list you would like to re-upload
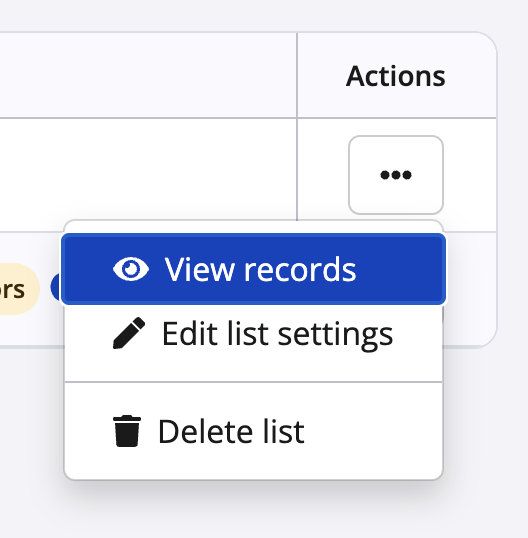
3. Choose the “View records” option
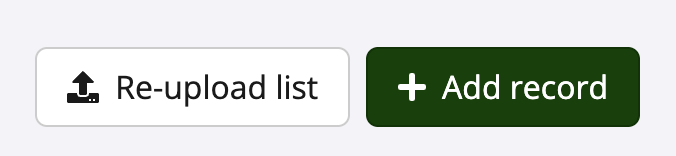
4. Click on the “Re-upload list” button
5. Confirm your choice on the modal
6. Make any changes to the list name or columns
7. Choose the CSV file you would like to upload
8. Click the blue “Next: Column Mapping” button
9. Map your selected data columns with the columns within your CSV file
10. Click the blue “Finish Upload” button
11. The list will be added to the validation list management page with the current import status
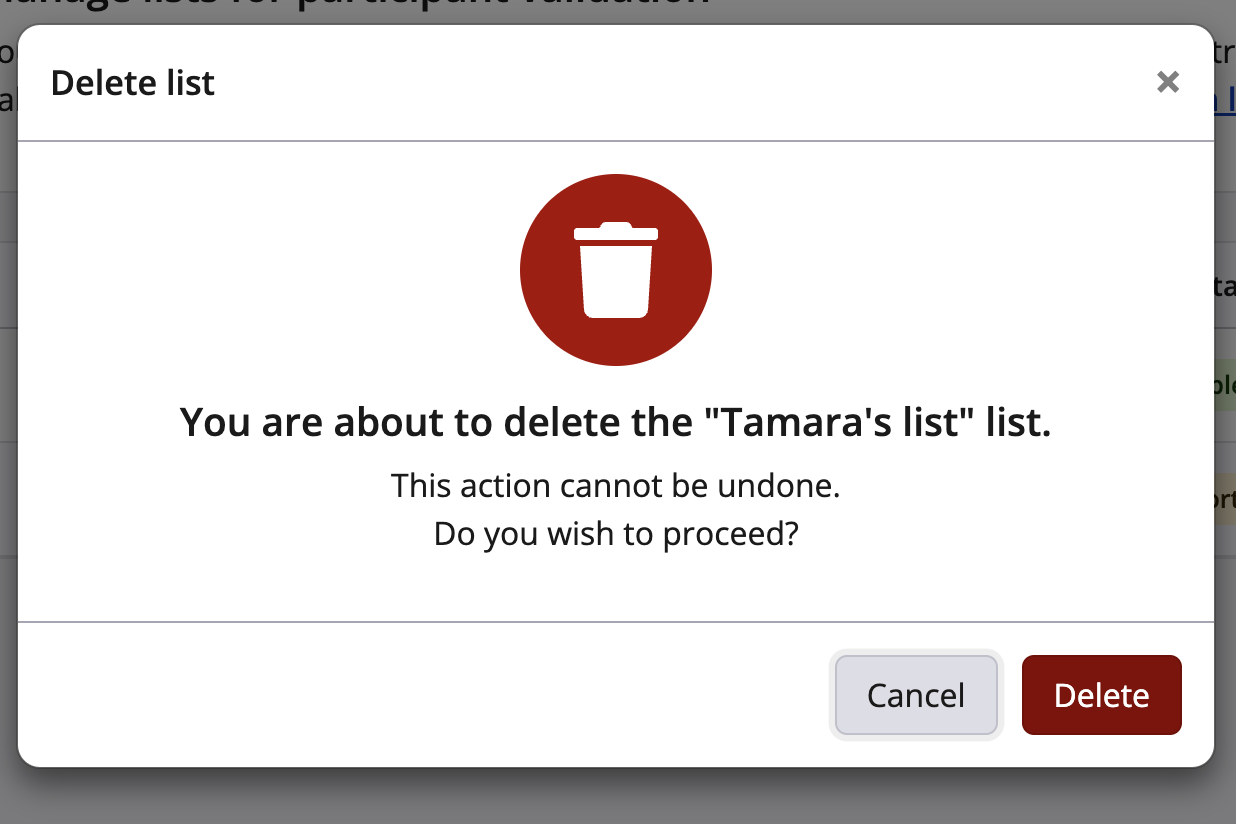
How to delete a validation list
1. Navigate to the validation list management page
2. Click on the “...” action button for the list you would like to delete
3. Choose the "Delete list" option
4. Confirm your choice in the modal

Managing uploaded records
Once a list is uploaded, you and edit the records in a variety of ways:
- Add record
- Edit record
- Delete record
- Resolve import errors
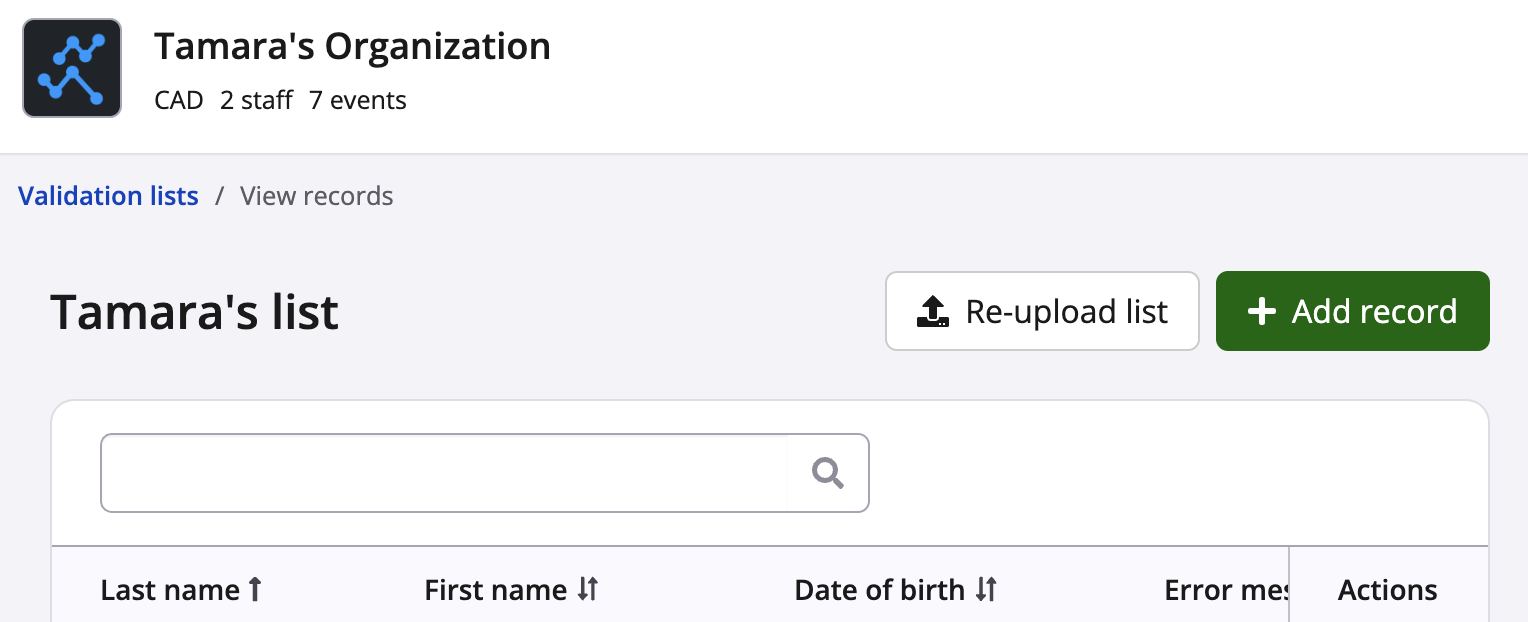
Viewing records
1. Navigate to the Validation list management page
2. Click on the “...” Action button for the list you would like to re-upload

3. Choose the “View records” option
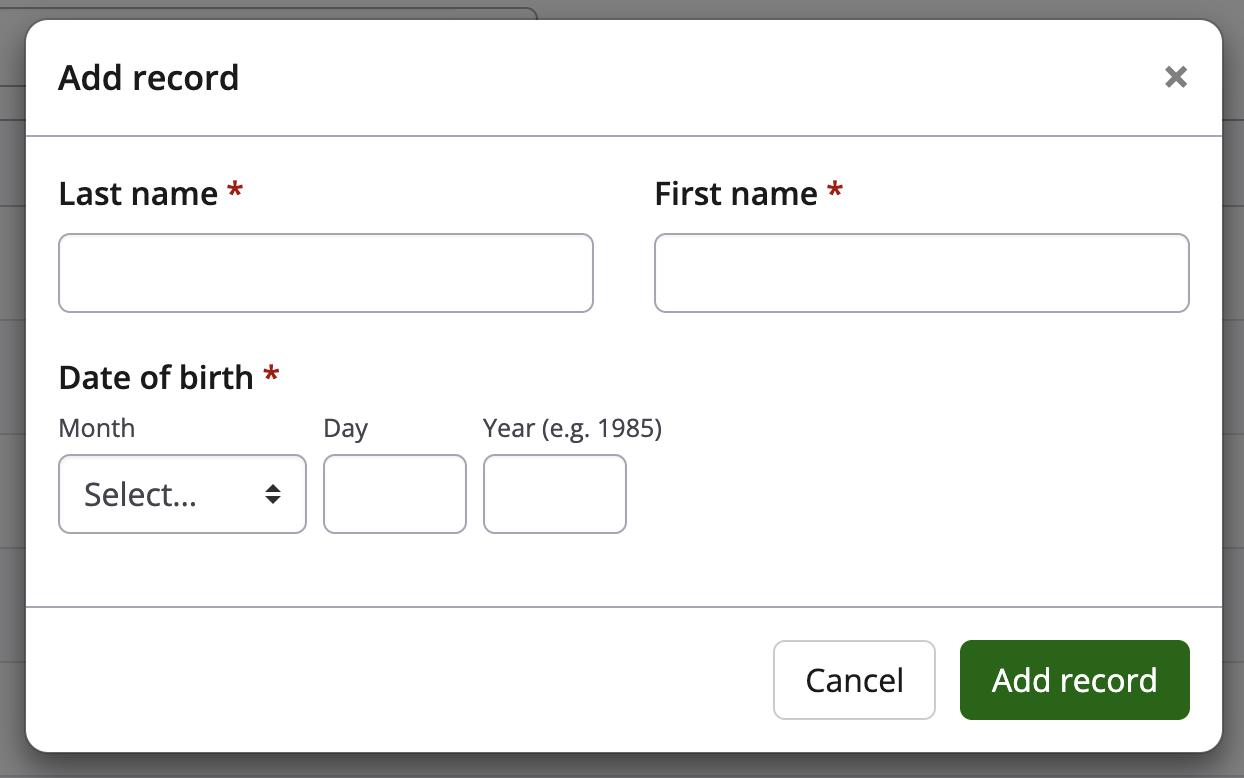
Adding a record
1. Choose the Add Record button
2. Fill out the fields that are relevant for your list set-up
3. Click the “Add record” option to add the record to the List
Editing a record
1. Click on the “...” Action button for the record you would like to edit
2. Select the “Edit record” option
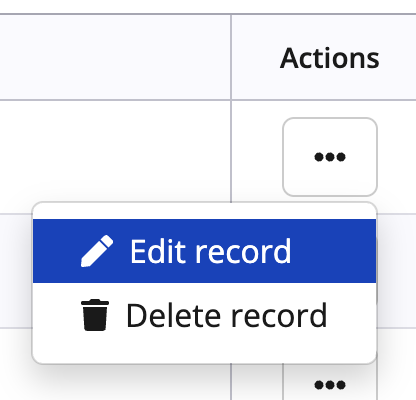
3. Edit the field that you would like to change
4. Click the “Update record” button

Deleting a record
1. Click on the “...” Action button for the record you would like to delete
2. Select the “Delete record” option
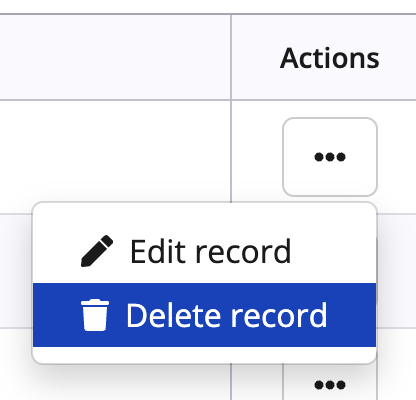
3. Confirm your choice
Troubleshooting
How to resolve an import error
To properly match a person in registration with a record in a list, all configured columns must match. This means that if a record has any blank fields, that record will not be able to be used for validation. During an import, if the system notices any missing fields it will provide an error message on the affected record as well as notify you within the import status.
Import status with errors
If your list has any errors, you can clear them by editing the record within the view records page, or by re-uploading a corrected CSV file.
List with errors

To clear errors within the View records page:
1. Locate the errors within the "Error message" column
a. You may need to use the Column Sort function to sort any errors to the top of the list
2. Click on the “...” Action button for the record that needs to be edited
3. Select the “Edit record” option

4. Add in data to the missing fields
5. Click the “Update record” button
6. The error should now be removed